Posted: Mon Dec 28, 15 11:31 pm
Mopar Muscle Association UK
The premier Mopar club in Europe!
http://www.moparuk.com/forums/
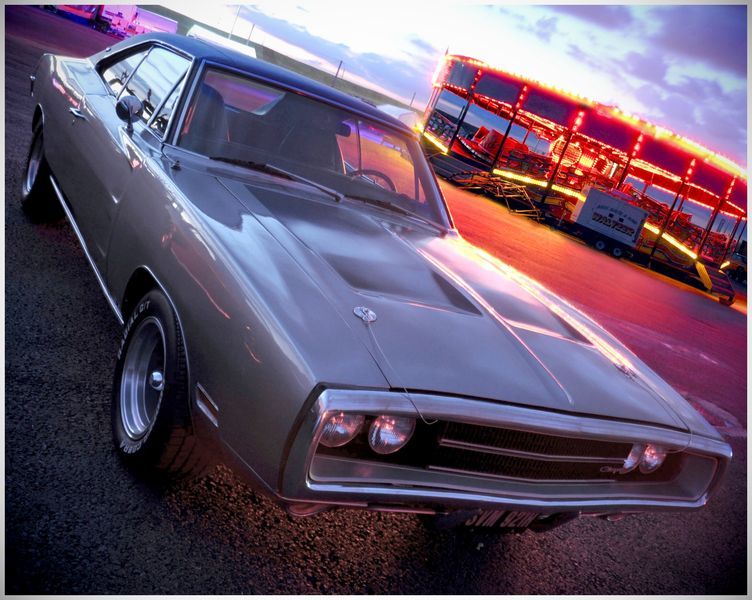
Si's '70 Charger 500
Page 9 of 17
Posted: Mon Dec 28, 15 11:42 pm
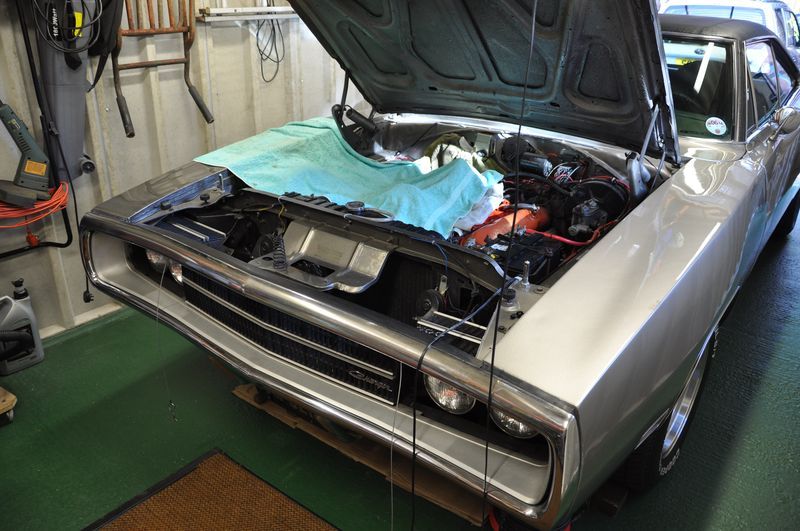
Back in 2013 ...
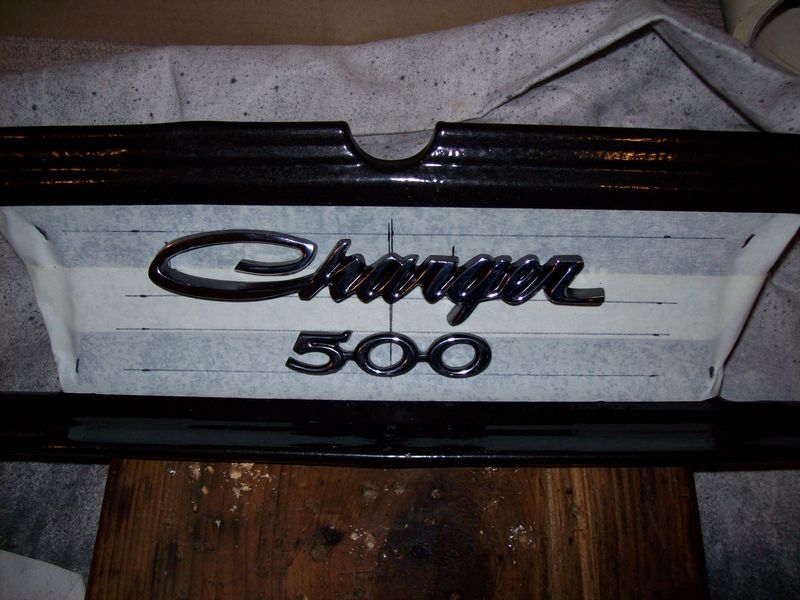
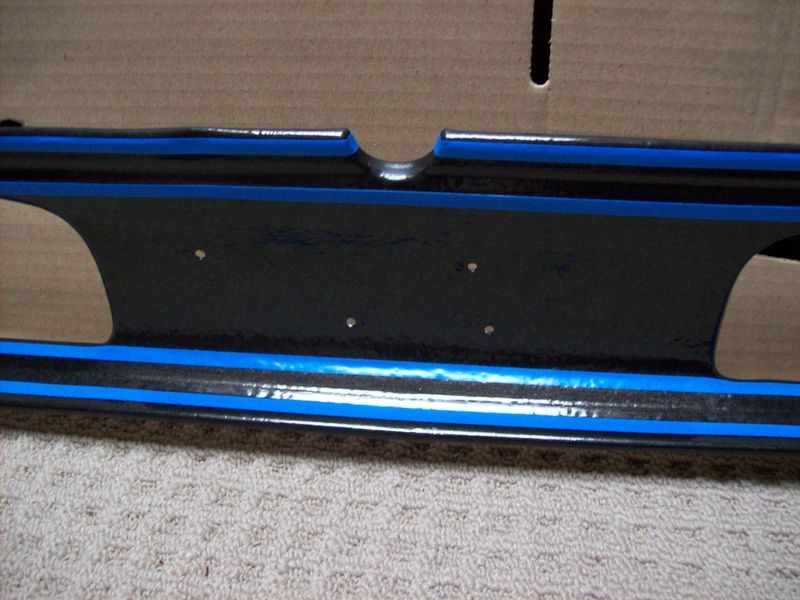
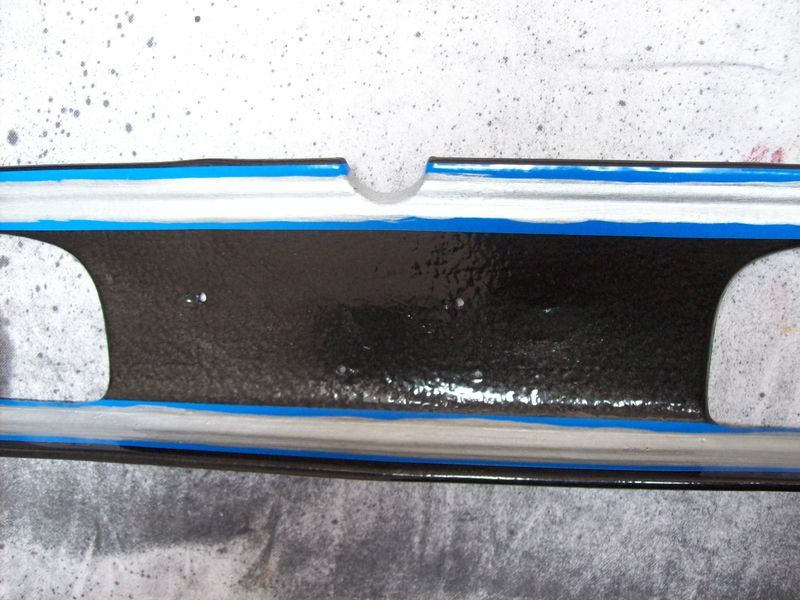
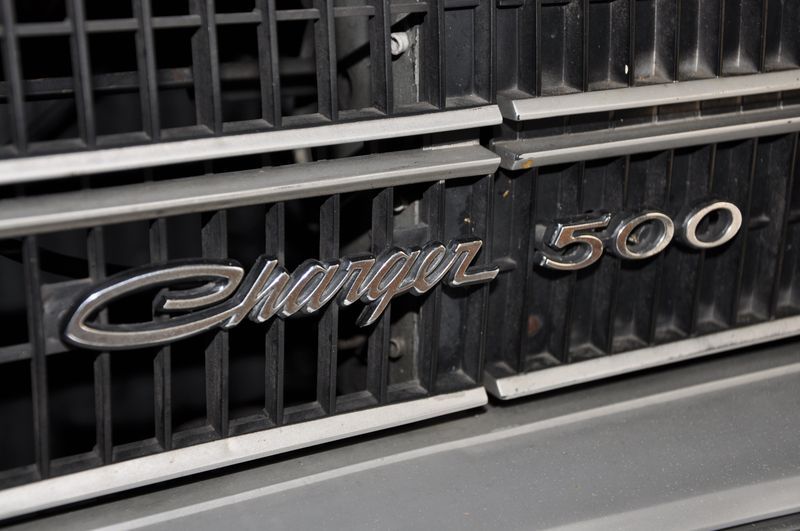
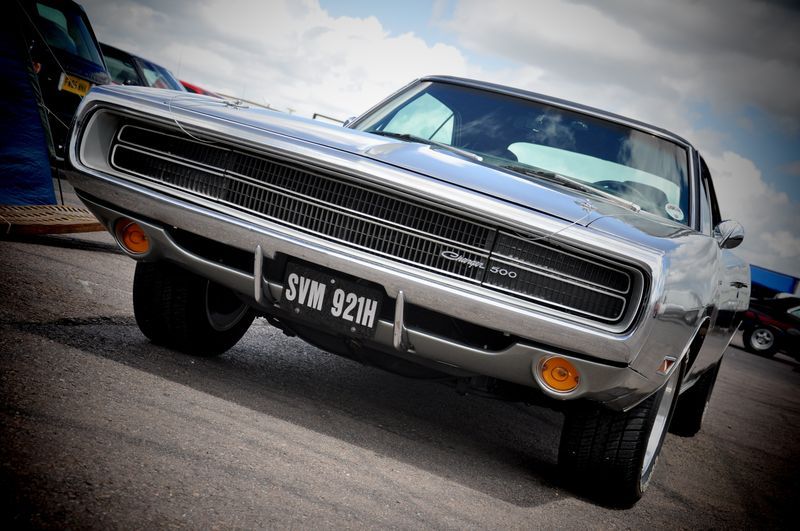
Refinished the rear tail panel and changed the Charger ‘arrow’ emblem to ‘500’
Seems lots of 500 models left the factory with the "arrow" emblem instead of the "500" emblem. Some had none, some had a 500 on front only, some had 500 on rear only, some got lucky and had 500 on front and rear. Never a clear tie-in with production dates. Some think there may have been shortages of the 500 emblems or possibly just mistakes by assembly line workers
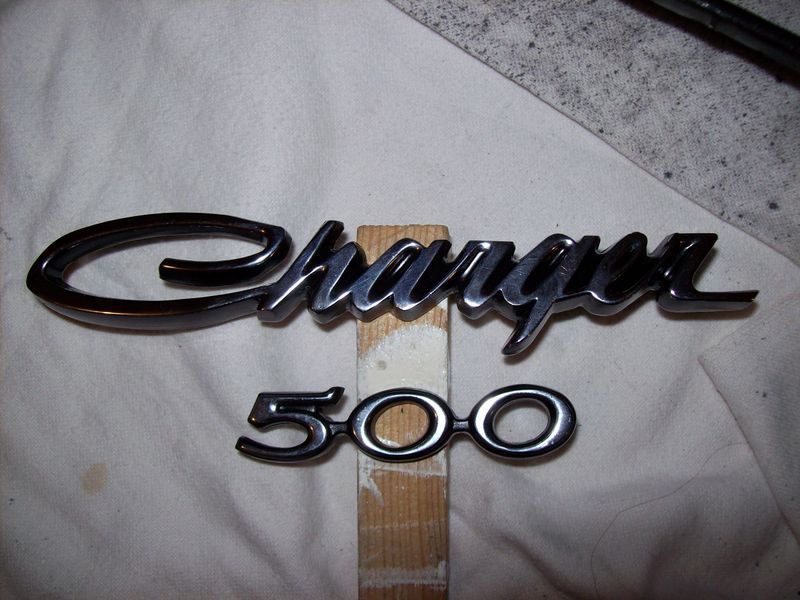
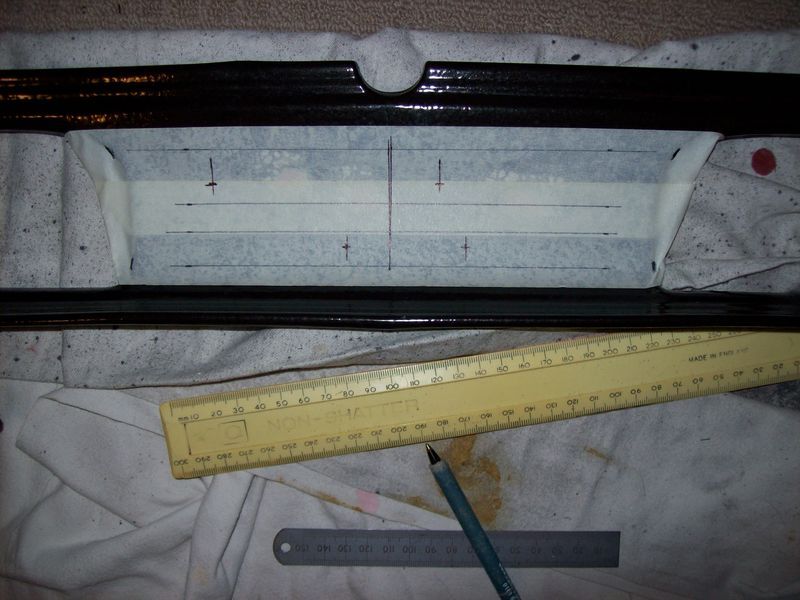
I decided to use the larger front grill type emblems on 2 lines instead of the correct emblems on 1 line …

Refinished the rear tail panel and changed the Charger ‘arrow’ emblem to ‘500’
Seems lots of 500 models left the factory with the "arrow" emblem instead of the "500" emblem. Some had none, some had a 500 on front only, some had 500 on rear only, some got lucky and had 500 on front and rear. Never a clear tie-in with production dates. Some think there may have been shortages of the 500 emblems or possibly just mistakes by assembly line workers
I decided to use the larger front grill type emblems on 2 lines instead of the correct emblems on 1 line …
Posted: Mon Dec 28, 15 11:54 pm
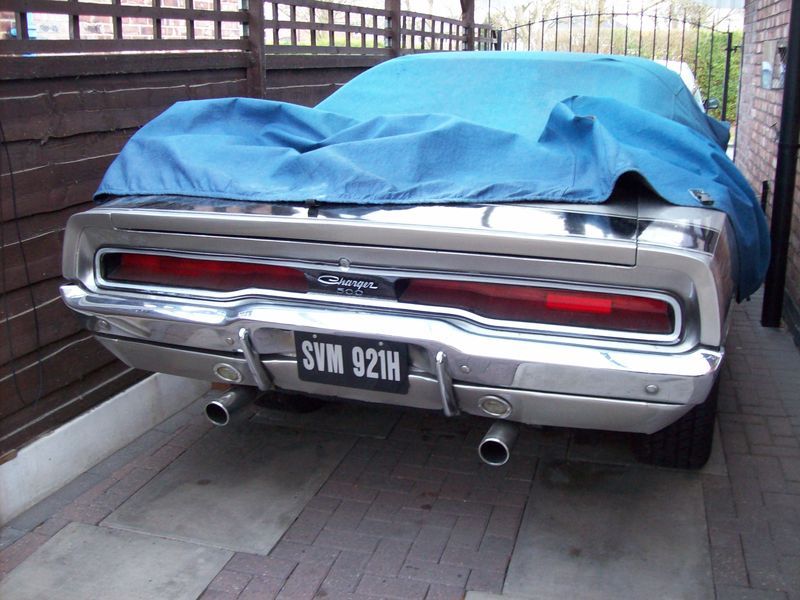
At the Mopar Nats 2013 Mark Skinner was snapping cars on the Friday night cruise …
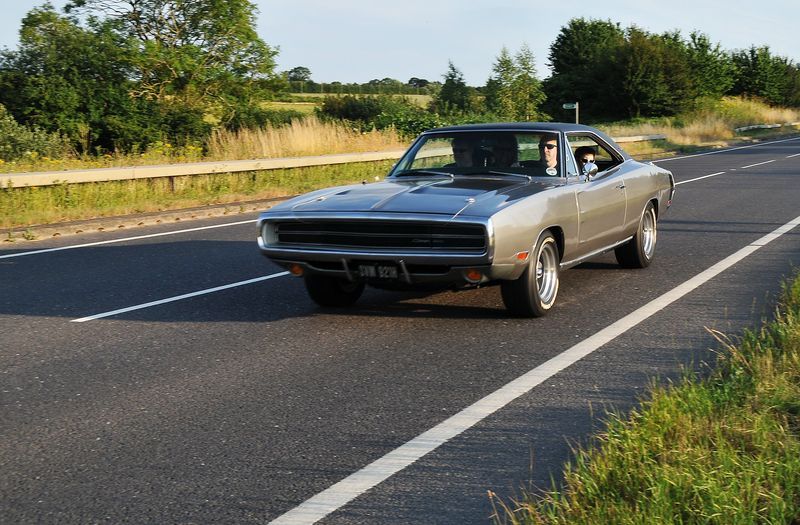
And a couple more from the Mopar Nats thanks to Andy Bennett of Doomsday Impala ... www.doomsdayimpala.co.uk …
And a couple more from the Mopar Nats thanks to Andy Bennett of Doomsday Impala ... www.doomsdayimpala.co.uk …
Posted: Thu Dec 31, 15 12:07 am
Back in 2014 ...
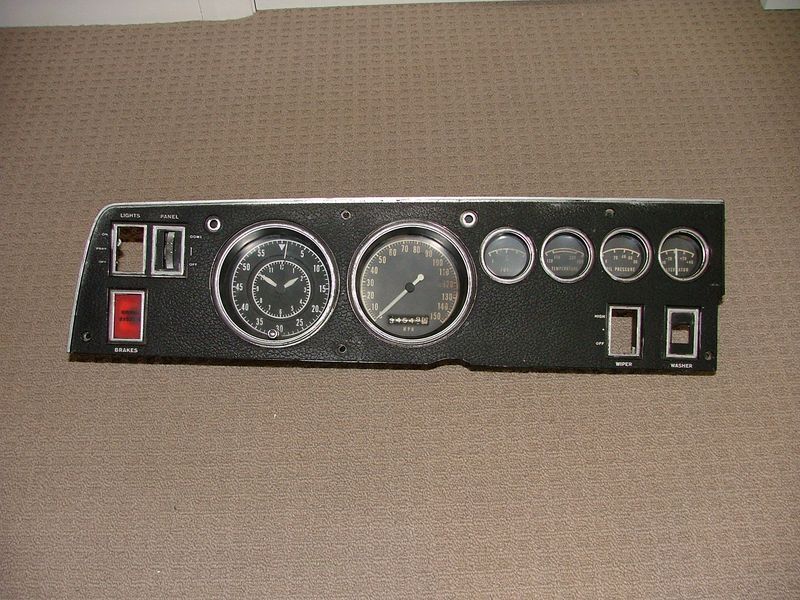
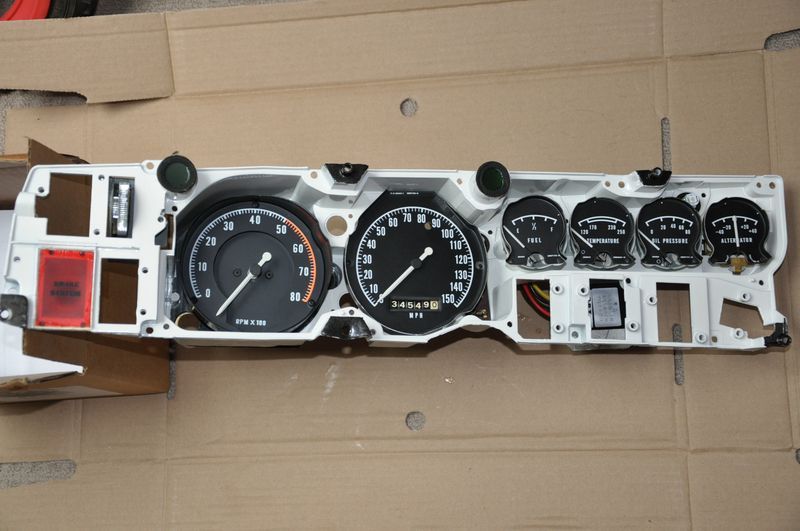
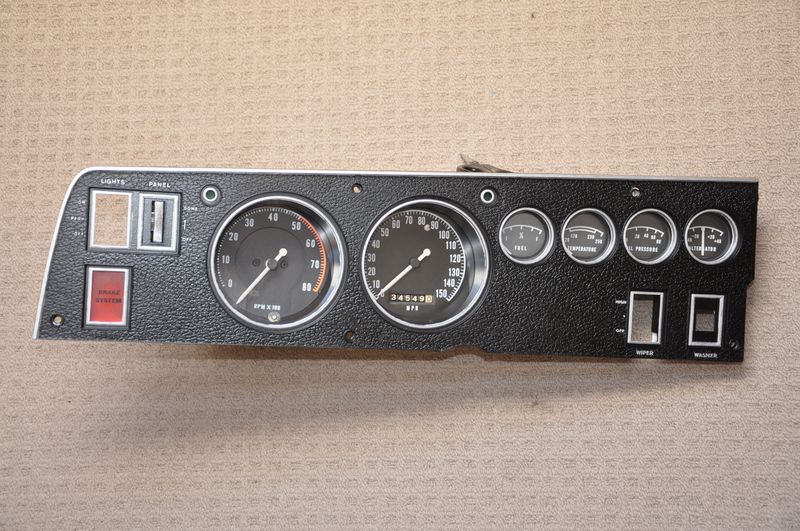
Refurbishing the original Rallye Dash Instrument Cluster
The previous owner had removed the original instrument cluster and built a custom panel with Autometer gauges
Whilst functional, it wasn’t to my taste, in my opinion the Rallye Dash doesn’t need any modification …
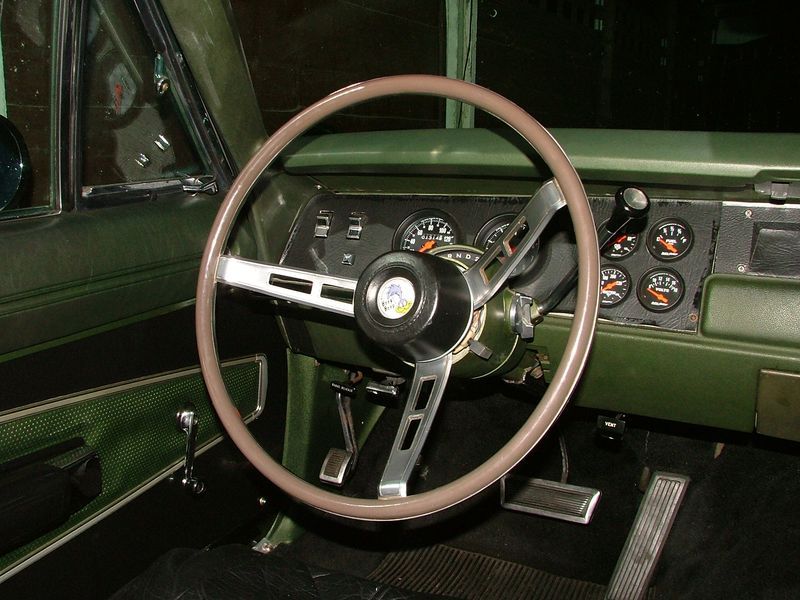
Fortunately the original instrument cluster came with the car …
I don’t know for certain so I’m guessing it was swapped out because most of it didn’t work
Another problem was the custom panel didn’t have a high beam warning light or turn signal repeaters, both of these required for MOT, whilst I could have added these to the custom panel I decided it was best to get on with the Rallye Dash resto …
So here’s the plan …
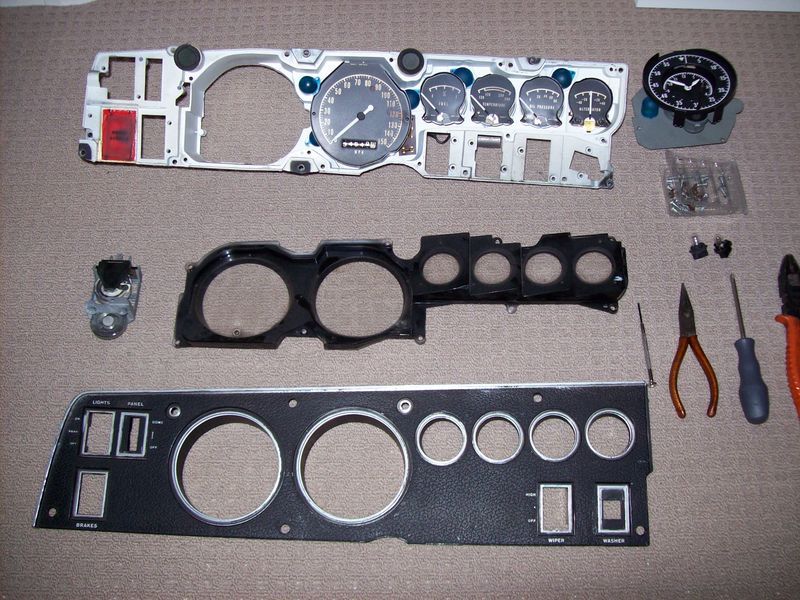
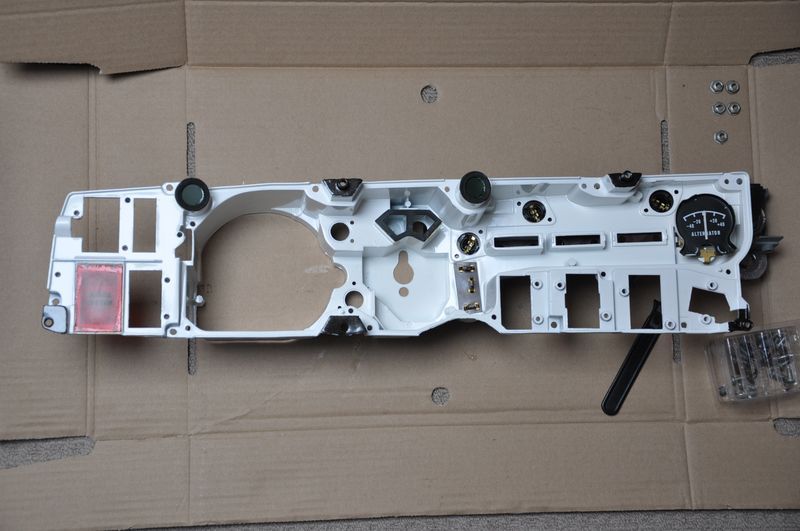
Take it to bits
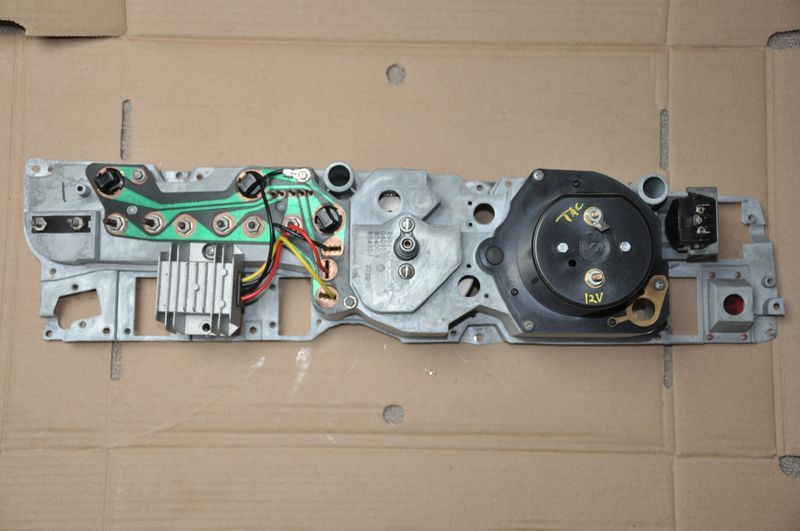
Replace mechanical voltage reg with an electronic version
Clean / repaint
Reface gauges
Install repro tacho without clock
Replace all backlight lamps with LED
Refurbishing the original Rallye Dash Instrument Cluster
The previous owner had removed the original instrument cluster and built a custom panel with Autometer gauges
Whilst functional, it wasn’t to my taste, in my opinion the Rallye Dash doesn’t need any modification …
Fortunately the original instrument cluster came with the car …
I don’t know for certain so I’m guessing it was swapped out because most of it didn’t work
Another problem was the custom panel didn’t have a high beam warning light or turn signal repeaters, both of these required for MOT, whilst I could have added these to the custom panel I decided it was best to get on with the Rallye Dash resto …
So here’s the plan …
Take it to bits
Replace mechanical voltage reg with an electronic version
Clean / repaint
Reface gauges
Install repro tacho without clock
Replace all backlight lamps with LED
Posted: Thu Dec 31, 15 12:09 am
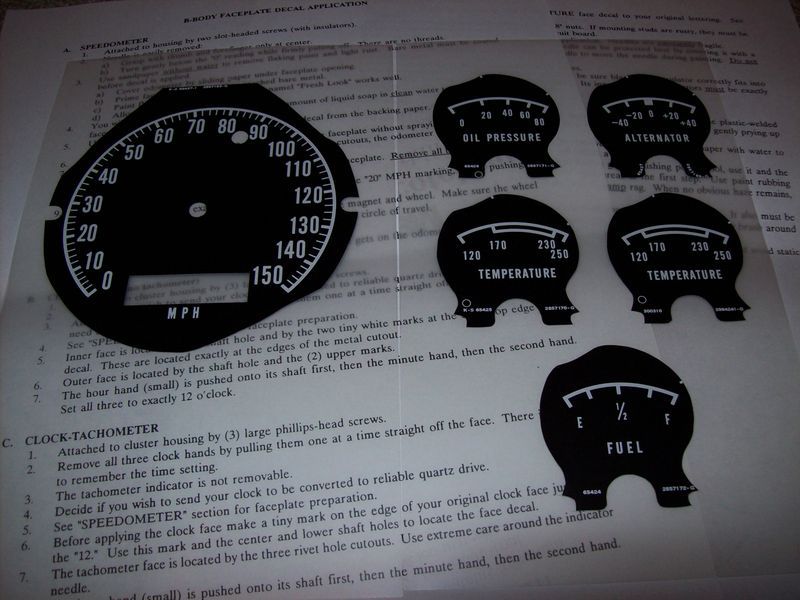
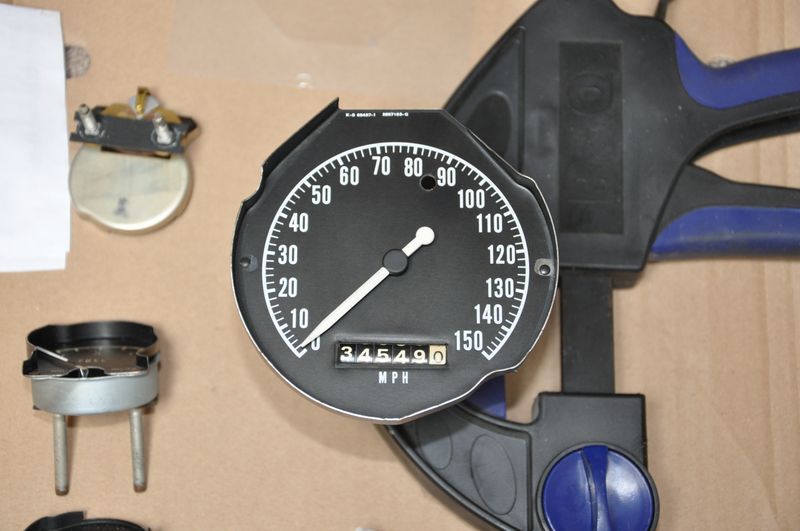
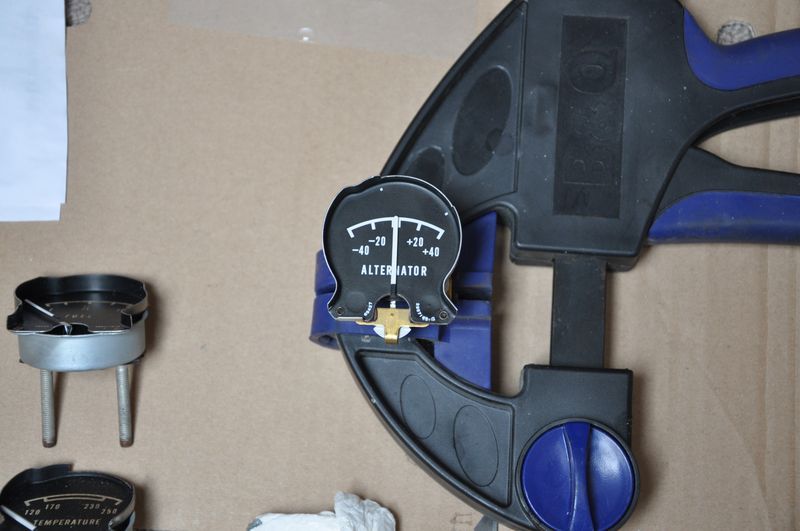
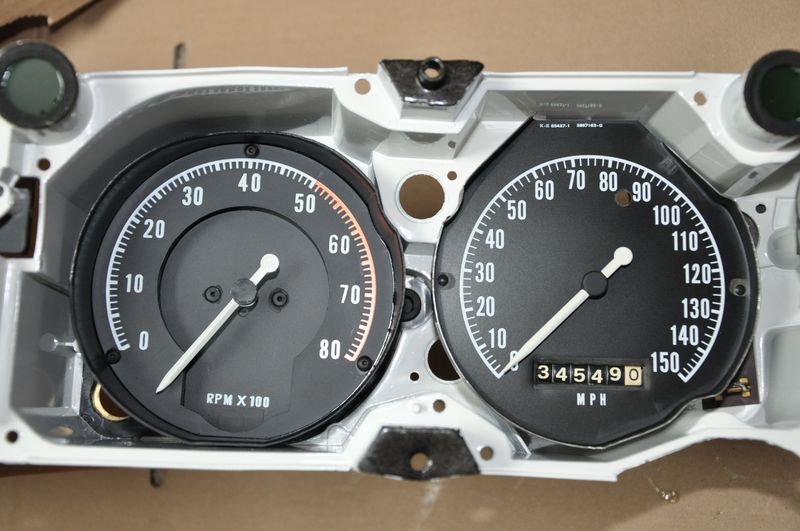
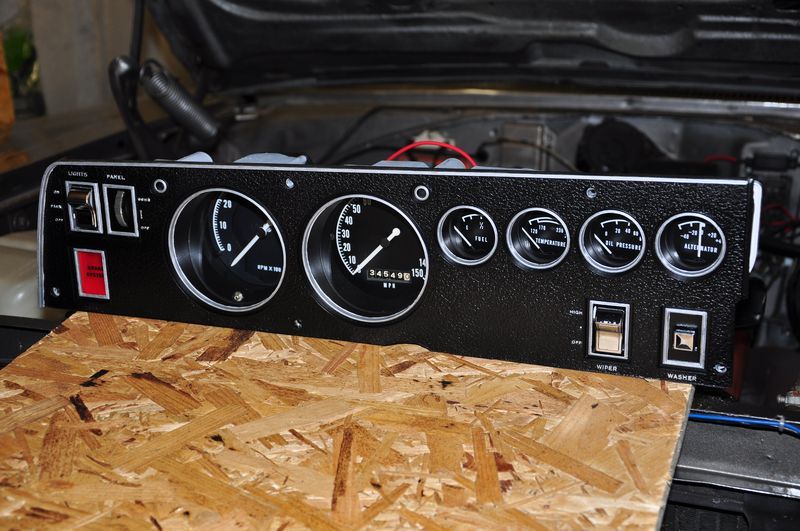
So the tear down began …
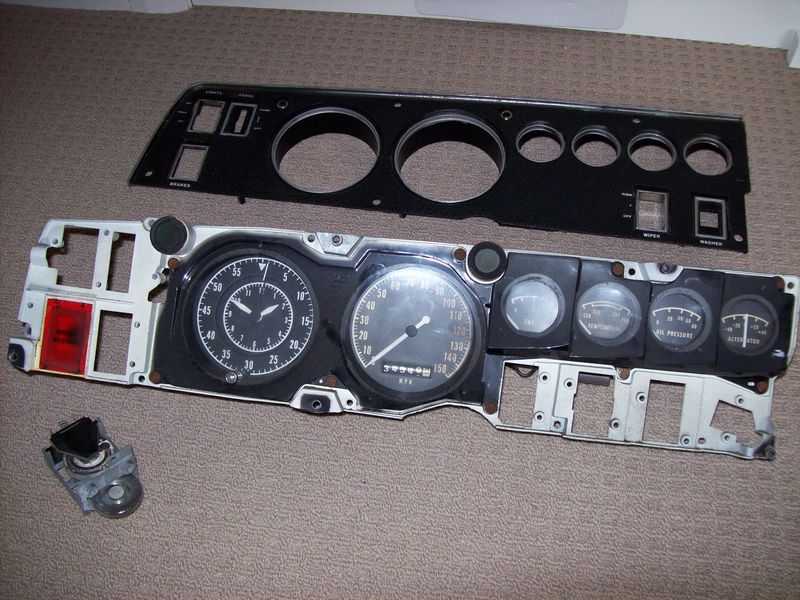
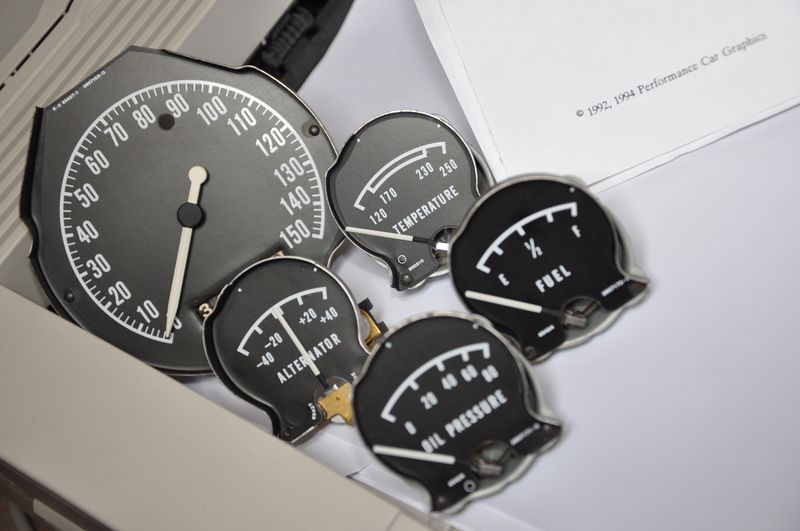
These are the new gauge faces from Performance Car Graphics …
http://www.performancecargraphics.com/D ... k-Tach.htm
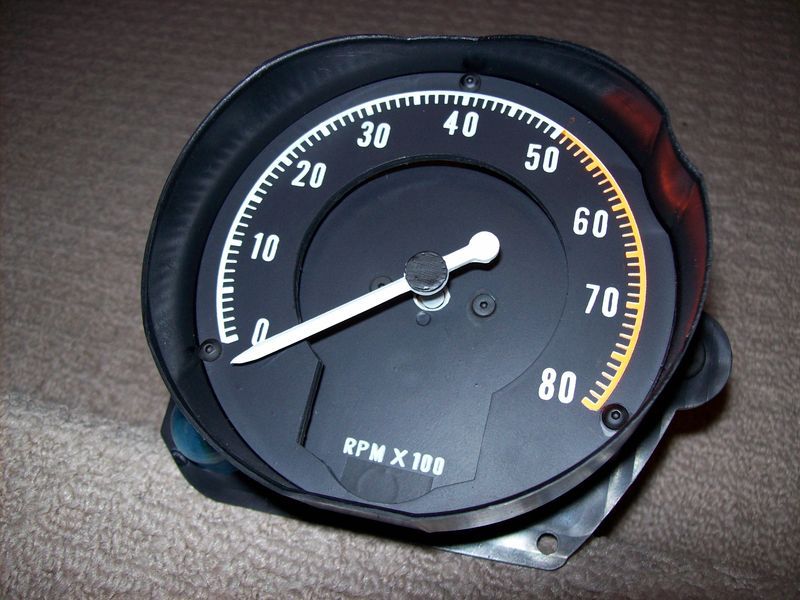
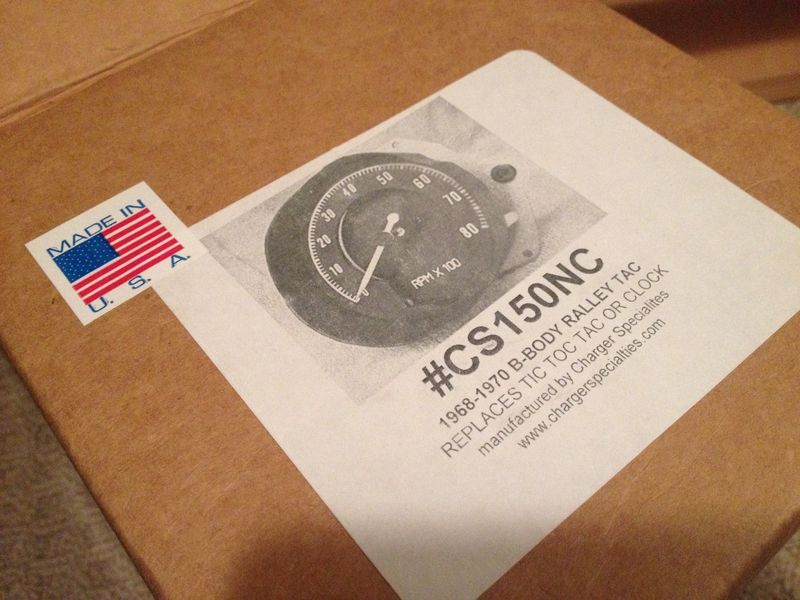
And the repro Tacho from Charger Specialities …
http://www.chargerspecialties.com/tachos.htm
These are the new gauge faces from Performance Car Graphics …
http://www.performancecargraphics.com/D ... k-Tach.htm
And the repro Tacho from Charger Specialities …
http://www.chargerspecialties.com/tachos.htm
Posted: Thu Dec 31, 15 12:11 am
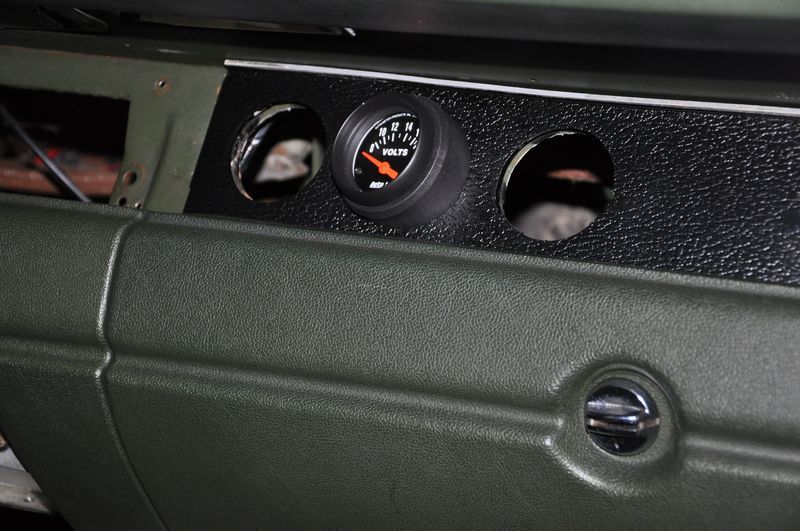
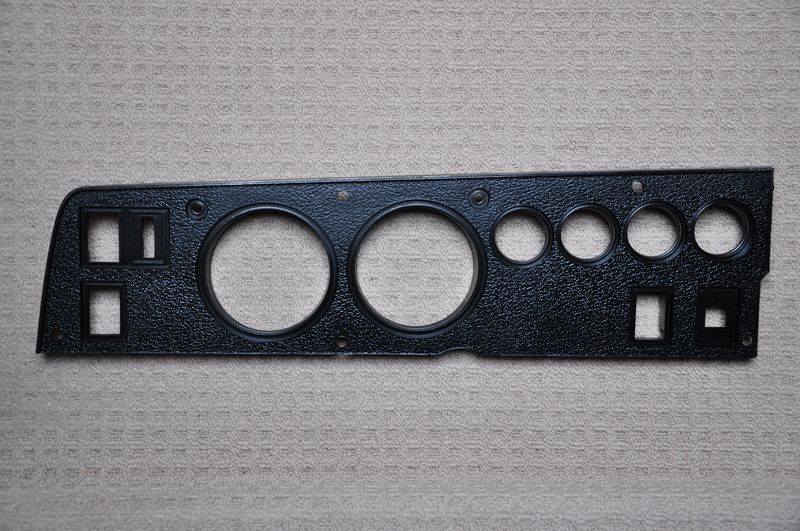
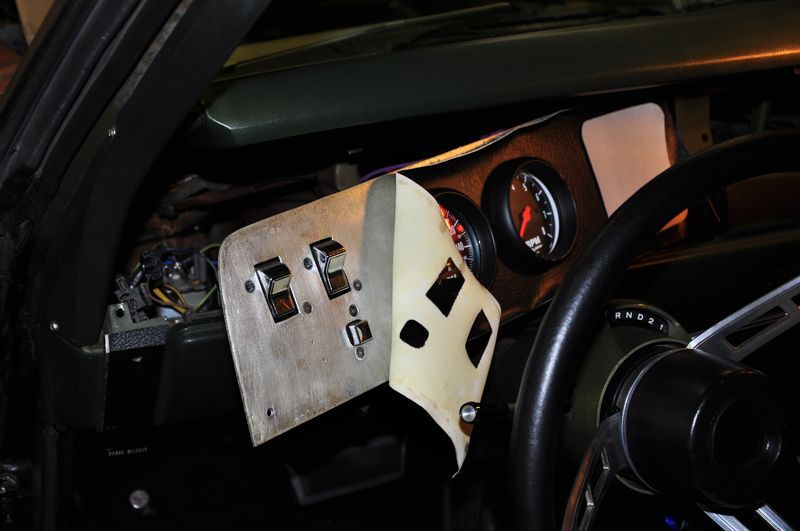
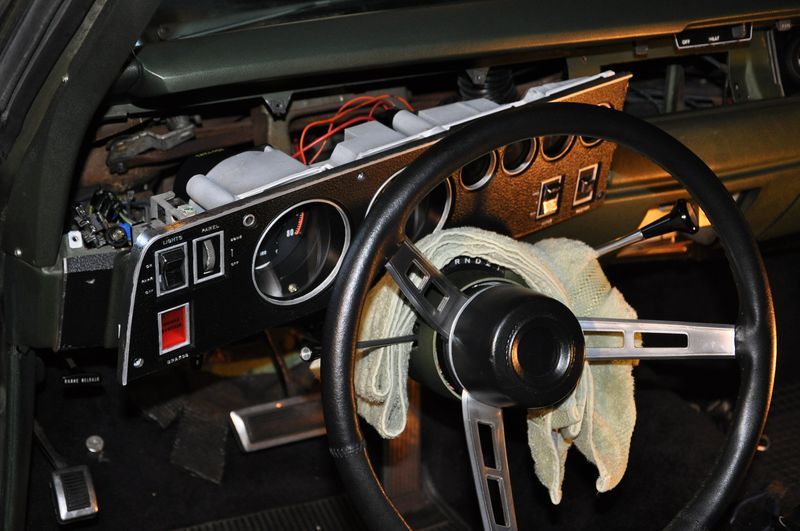
Back in the car, I wanted to keep the 3 mechanical Autometer gauges and decided to relocate them to the passenger side using angle rings to turn them toward the driver
I wasn’t too mithered about cutting the passenger side dash panel as it had already been drilled for the non-standard emblems shown in the first few photos above
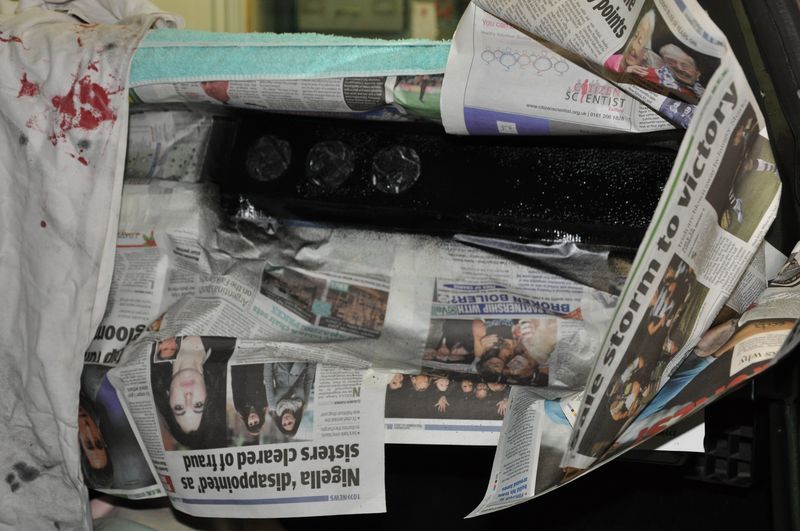
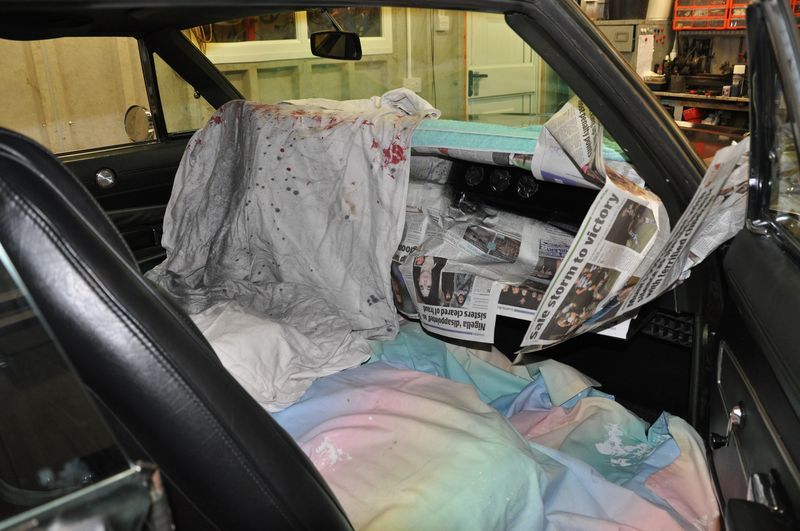
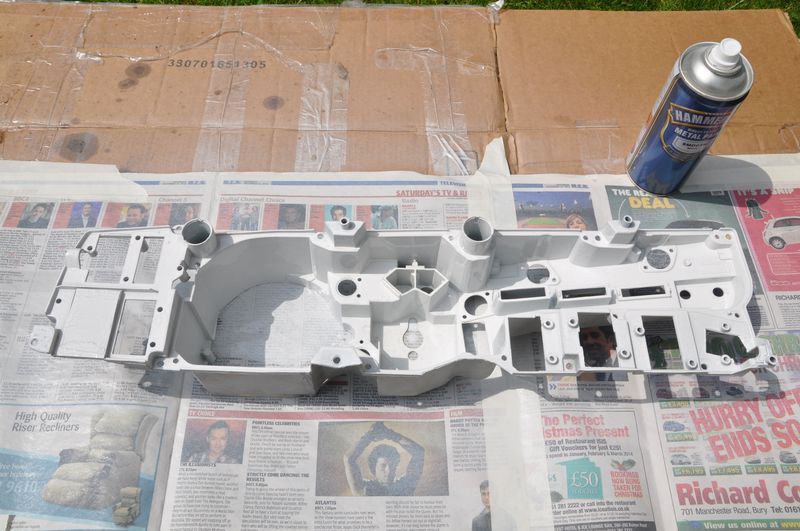
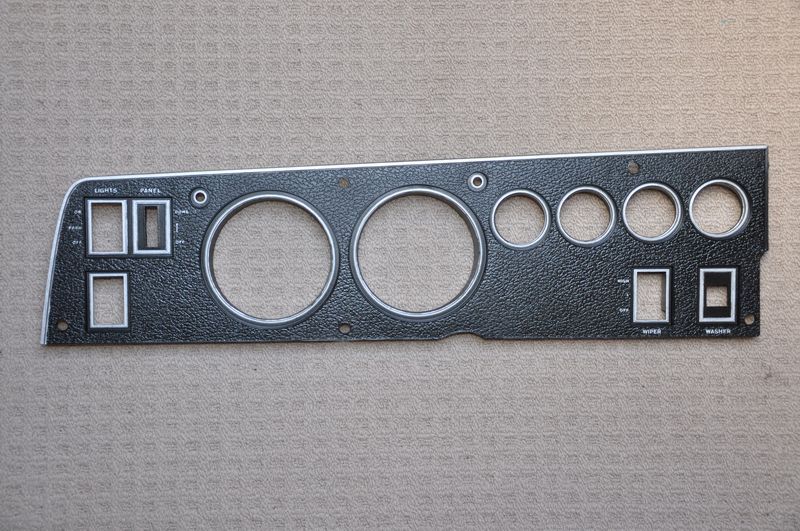
I tried to get the panel out for painting but it wasn’t having any of it, so masked it all off and sprayed it in place …
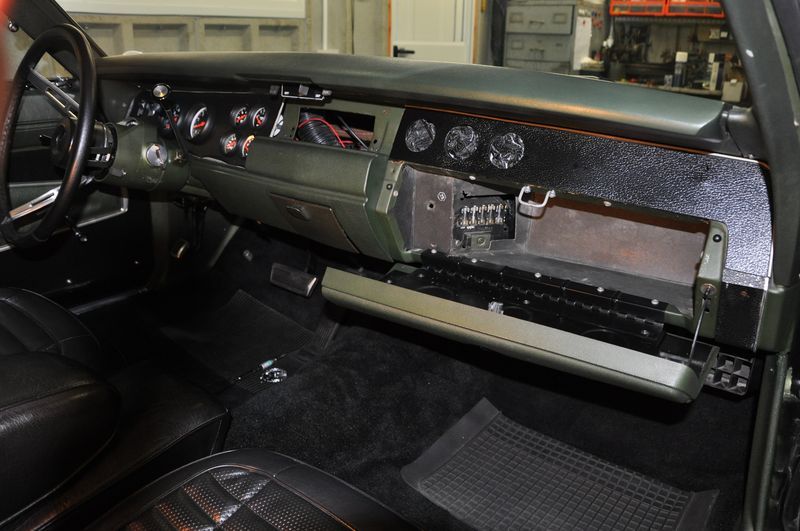
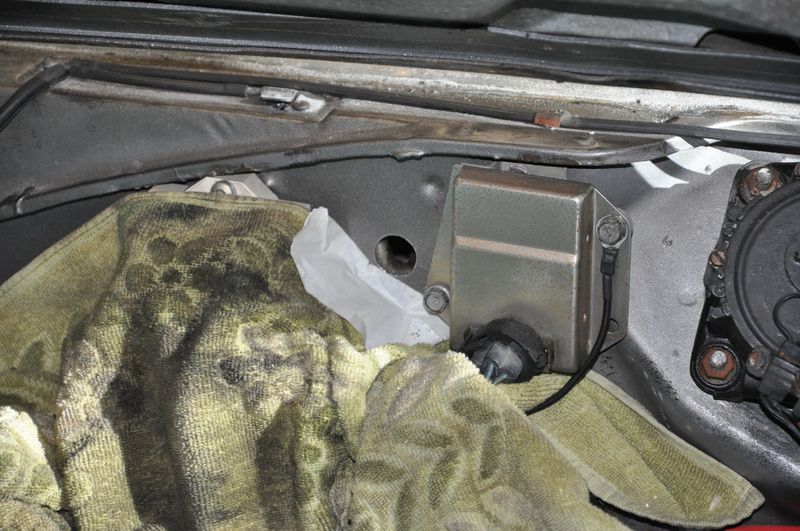
Next a new hole in the firewall to re-route the capillaries through to the passenger side
The new hole brings the capillaries through just above the heater box …
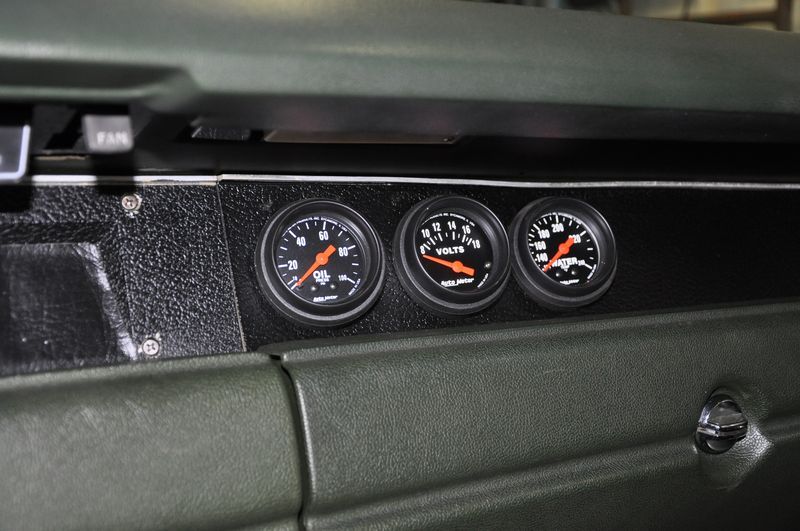
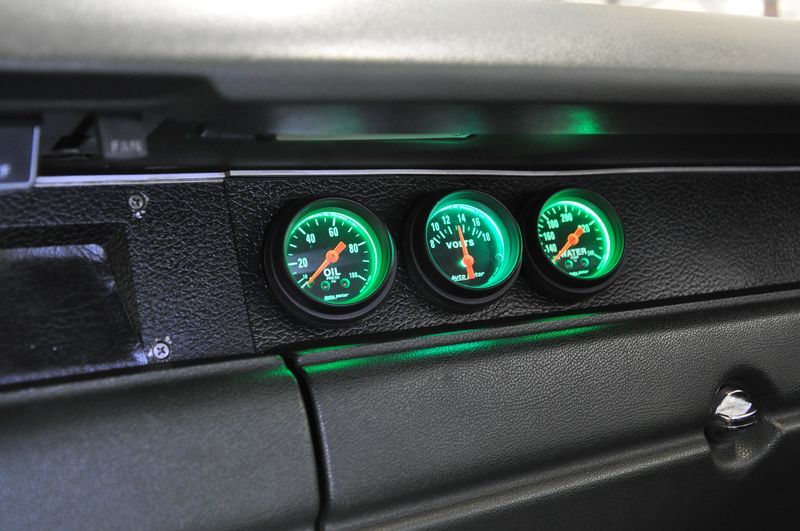
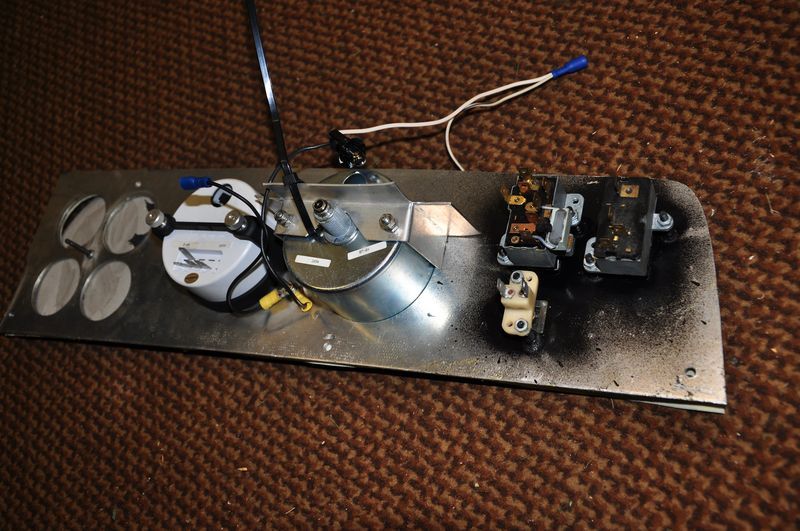
Pulled the gauges from the old panel and installed in the new location …
Oil, Volts and Water temp in and connected up
Maybe not everyone’s cuppa but I like it …
I wasn’t too mithered about cutting the passenger side dash panel as it had already been drilled for the non-standard emblems shown in the first few photos above
I tried to get the panel out for painting but it wasn’t having any of it, so masked it all off and sprayed it in place …
Next a new hole in the firewall to re-route the capillaries through to the passenger side
The new hole brings the capillaries through just above the heater box …
Pulled the gauges from the old panel and installed in the new location …
Oil, Volts and Water temp in and connected up
Maybe not everyone’s cuppa but I like it …
Posted: Thu Dec 31, 15 12:13 am
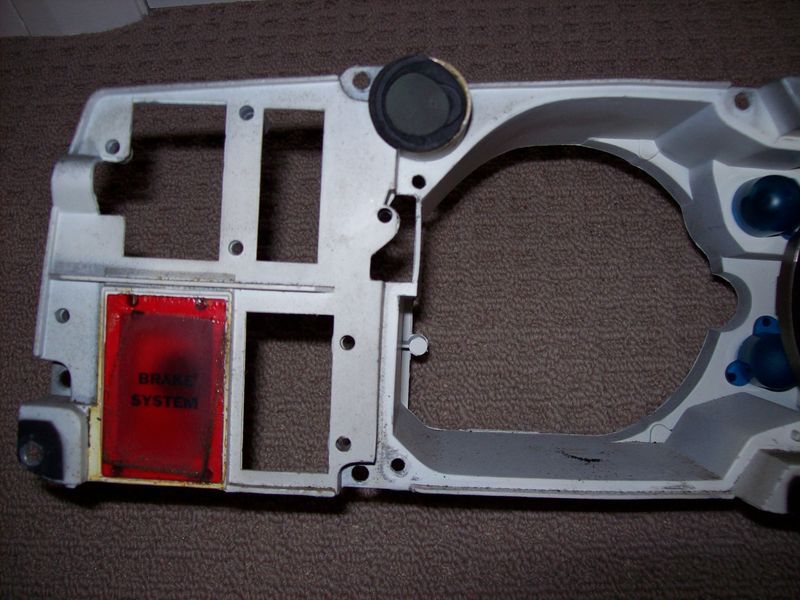
Back on the Rallye Dash Instrument Cluster
Gave the frame a waft over with gloss white …
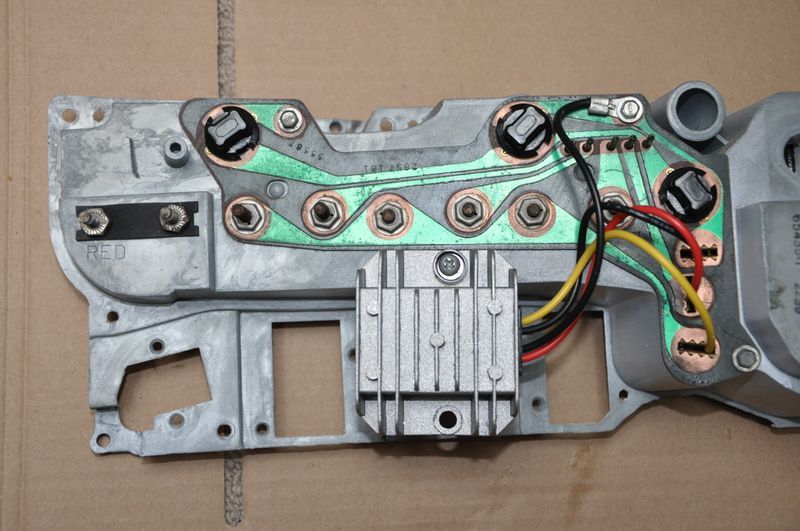
For the 5v voltage reg I went for a CPT device including heat sink and built in over voltage and under voltage protection …
http://www.ebay.co.uk/itm/25W-DC-DC-12V ... 0930951097
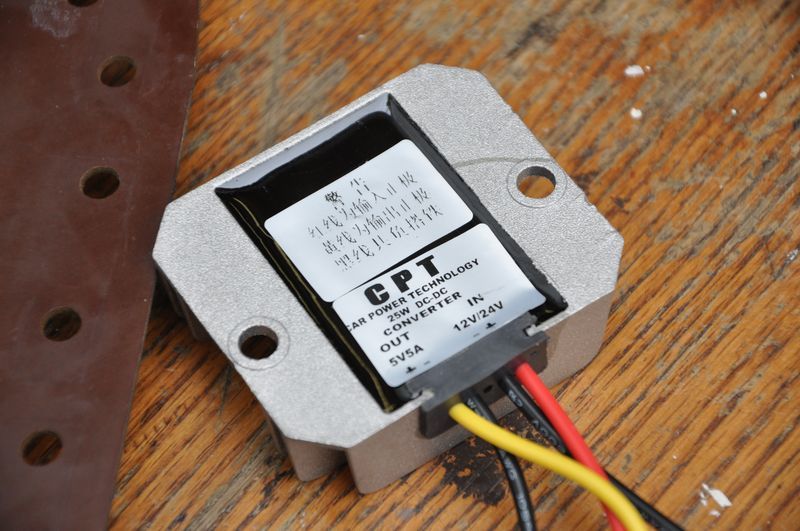
Soldered the tails into the pcb where the mechanical voltage reg used to sit …
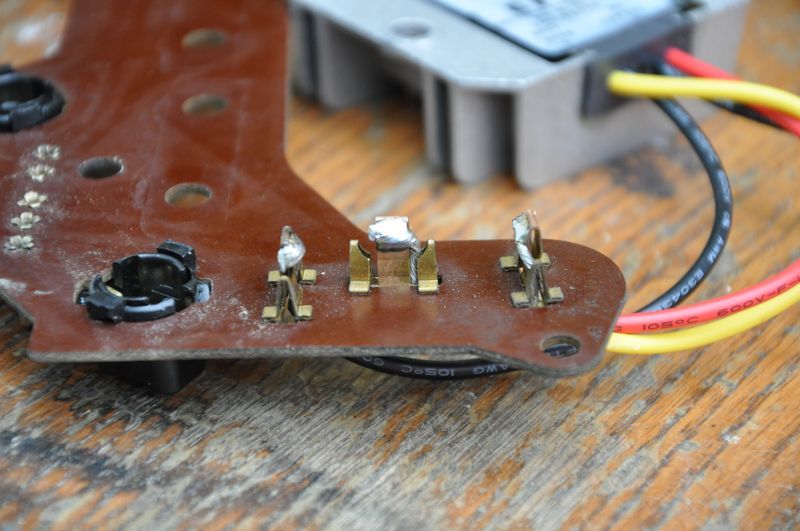
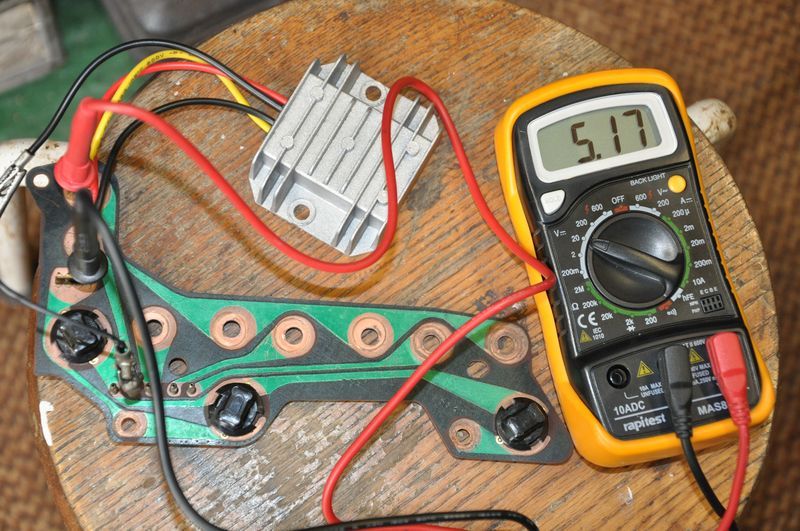
Testing …
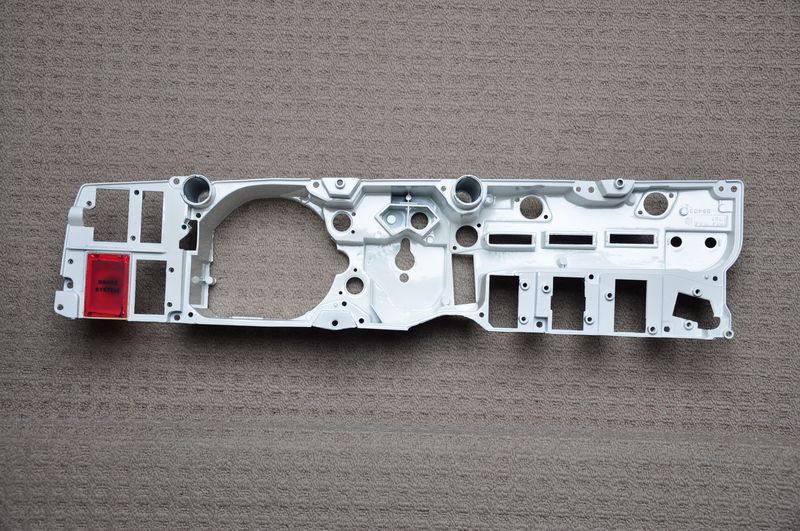
Brake and indicator lenses polished and reinstalled, dash panel painted and lined silver
Gave the frame a waft over with gloss white …
For the 5v voltage reg I went for a CPT device including heat sink and built in over voltage and under voltage protection …
http://www.ebay.co.uk/itm/25W-DC-DC-12V ... 0930951097
Soldered the tails into the pcb where the mechanical voltage reg used to sit …
Testing …
Brake and indicator lenses polished and reinstalled, dash panel painted and lined silver
Posted: Thu Dec 31, 15 12:15 am
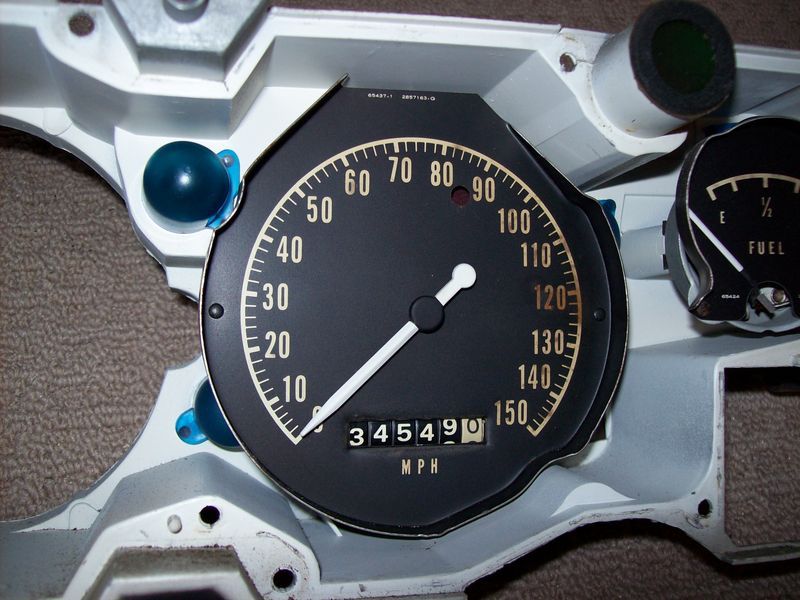
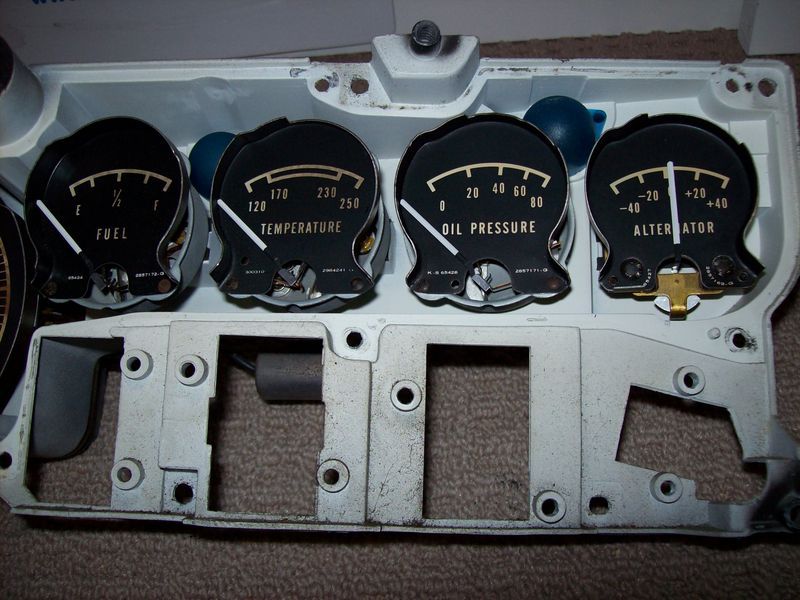
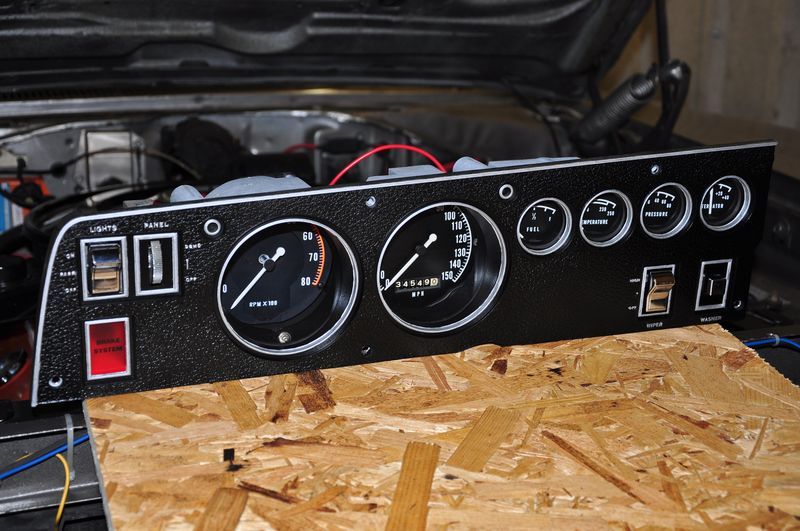
New gauge faces applied …


Got everything reinstalled …
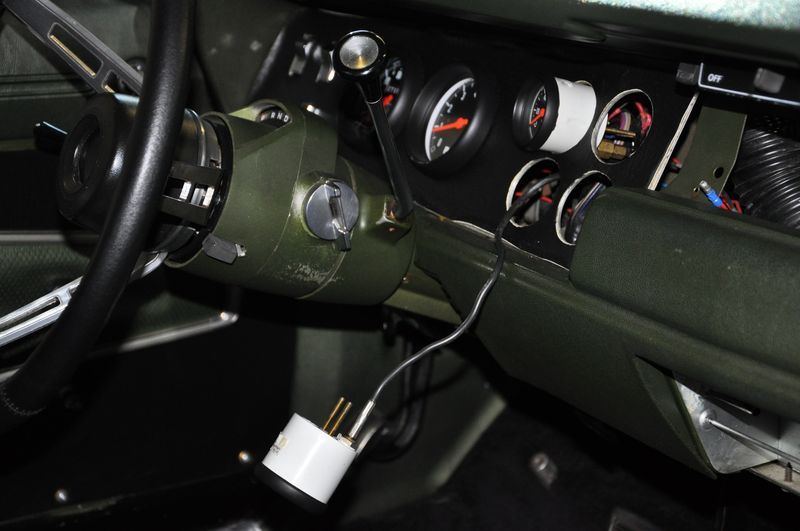
The electronic 5v voltage reg fits well behind the gauges using the screw hole where the original suppressor used to be …
Tested all the gauges, backlights and warnings lights etc during the build up …
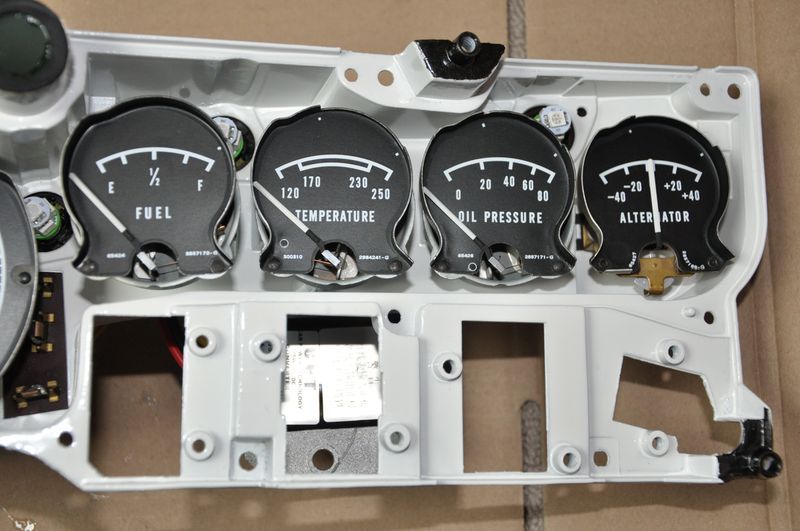
Got everything reinstalled …
The electronic 5v voltage reg fits well behind the gauges using the screw hole where the original suppressor used to be …
Tested all the gauges, backlights and warnings lights etc during the build up …
Posted: Thu Dec 31, 15 12:17 am
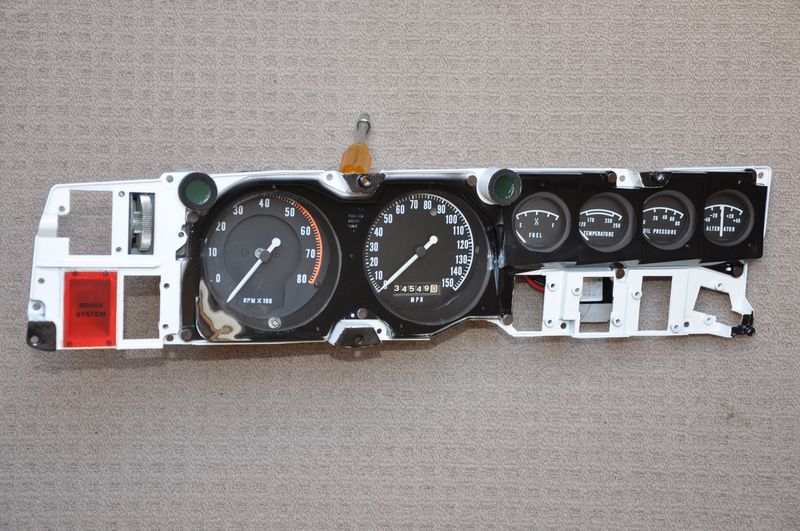
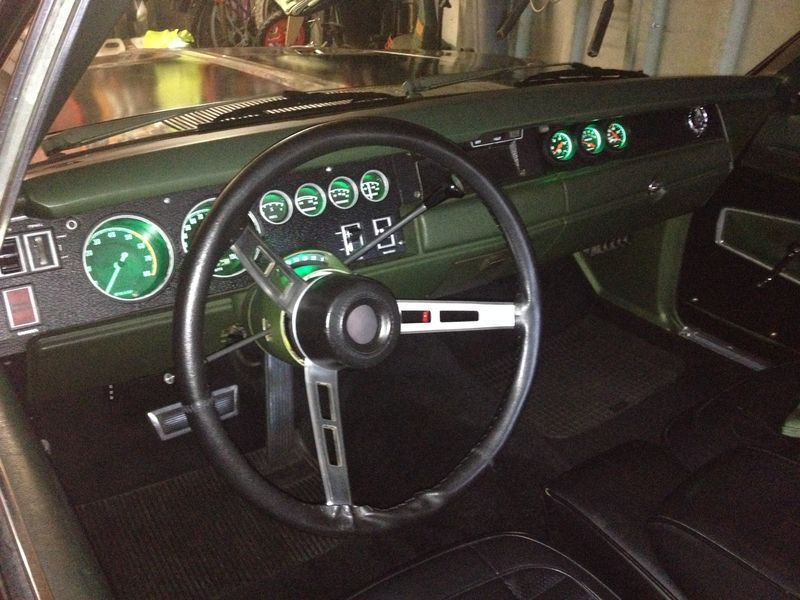
The finished Rallye Dash Instrument Cluster ready to go in the car
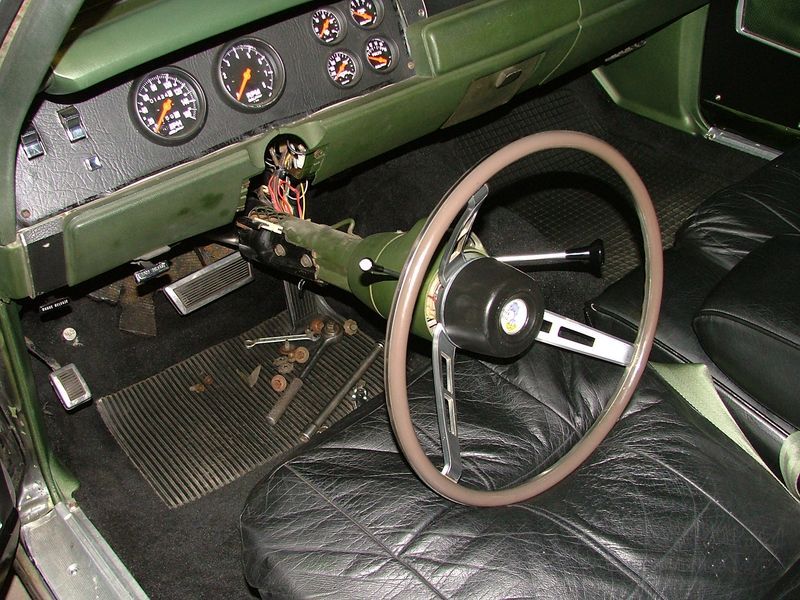
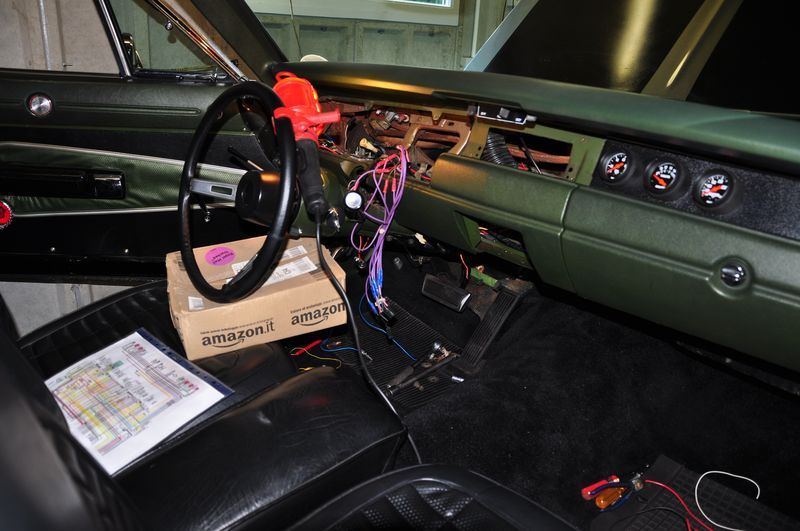
Next to rip out the custom panel …
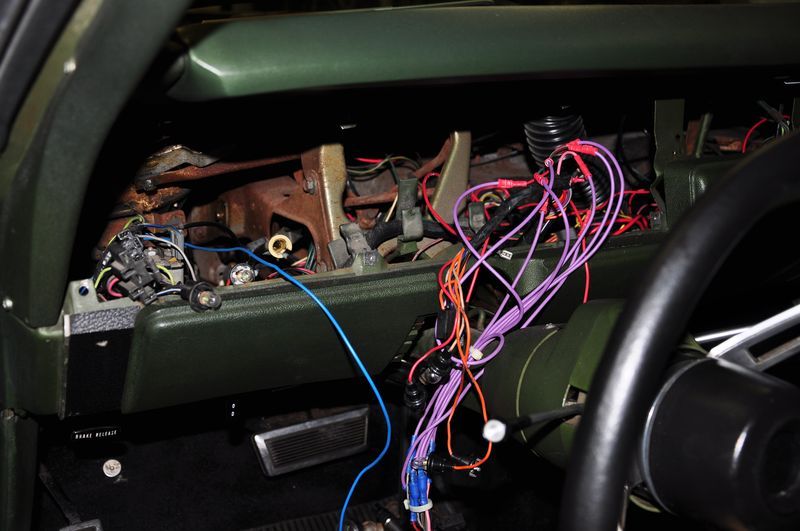
The original wiring was all in place aside from the windshield wiper switch loom (lilac wires) that had been extended, this was cut out and restored to original …
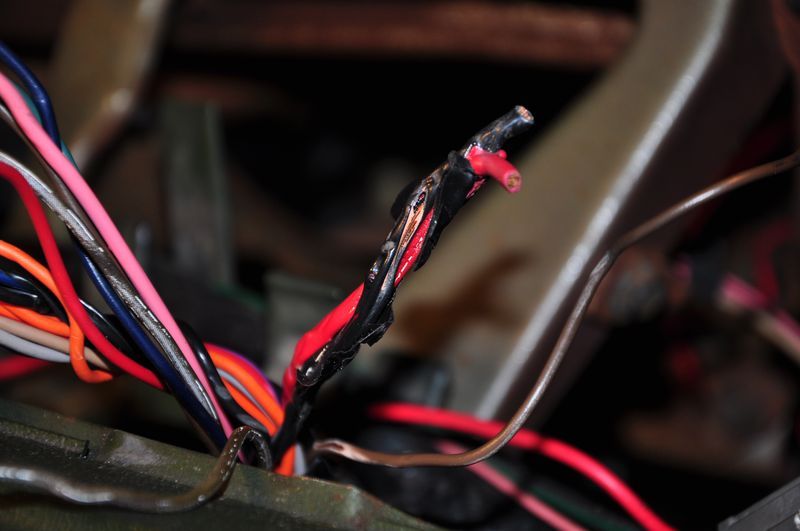
Even remains of the charred ammeter wires, bypassed a long time ago …
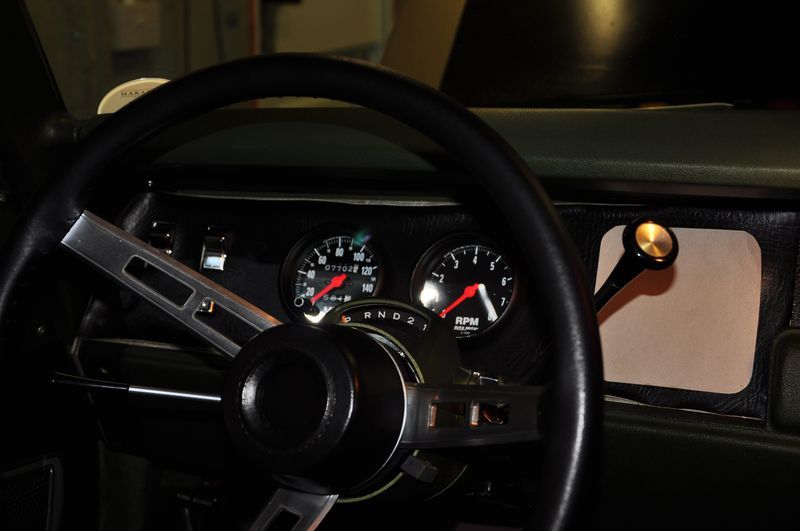
In goes the Rallye Dash Instrument Cluster …
Job job’d …
Next to rip out the custom panel …
The original wiring was all in place aside from the windshield wiper switch loom (lilac wires) that had been extended, this was cut out and restored to original …
Even remains of the charred ammeter wires, bypassed a long time ago …
In goes the Rallye Dash Instrument Cluster …
Job job’d …
Posted: Thu Dec 31, 15 12:19 am
Everything worked a treat and passed MOT …

Posted: Thu Dec 31, 15 12:56 am
Car is a credit to you Si ... well doneCharger wrote:Everything worked a treat and passed MOT …
Posted: Thu Dec 31, 15 8:08 am
Nice work, looks so much better. In the past I have taken new Autometer gauges apart to paint the needles white so they match, I need to get out more...
Posted: Thu Dec 31, 15 9:01 am
Looks good, nice work on the dash
Posted: Thu Dec 31, 15 10:46 am
That looks really nice, great work. 
Is that a standard dodge wheel or aftermarket?
Is that a standard dodge wheel or aftermarket?
Posted: Thu Dec 31, 15 10:49 am
Looks great, I have this job to do on my Charger as well this winter.
I notice you did not drop the steering column, like everybody says you need to, is it possible to get rally dash in and out with out doing that ?
Also when you say "Brake and indicator lenses polished and reinstalled, dash panel painted and lined silver" Lined silver, how did you do that ?
I notice you did not drop the steering column, like everybody says you need to, is it possible to get rally dash in and out with out doing that ?
Also when you say "Brake and indicator lenses polished and reinstalled, dash panel painted and lined silver" Lined silver, how did you do that ?