Dave Robsons Challenger R/T

Use this forum for all your builds in progress.

Moderator: Moderators

Post Reply
User avatar
Dave-R
Posts: 24752
Joined: Sun Apr 18, 04 11:23 pm
Location: Dave Robson lives in Geordieland
Contact:

Post by Dave-R »

Ivor wrote:That looks great Dave, but how come the top restorers go for the full body colour, complete with overspray over the floor, with just primer in the middle, under the impression that this is "factory"?

Do you know something they don't? ;)
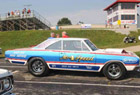
They did indeed paint the cars like that. Usually with less overspray on the underbody than you see on a lot of restorations. Overspray was very slight when you look at original cars.

Maybe some mopars didn't get any black out treatment but I know Challengers did because I have seen photos of completely original cars that show it quite clearly. Although because they sprayed over the top coat it does tend to wear off easily.

Chrysler were sensative about how their cars looked even if they were cheap. Which is why they painted behind the grille black as well.

Every one knows that you paint behind the grille now. But many "expert" restorers didn't for many years. I got sick of seeing body paint through the grille on "Top Dollar" Challengers.
The front side of the radiator closure panel, below the top support (upper radiator "U" channel) and underneath the hood latch plate was painted Organasol Black except for TX9, EB7 and EF8. Overspray was permitted half way into the inside headlamp area.
But not many seem to have taken much heed of the next bit.
On all colours, except TX9, EB7 and EF8, the flange below the door sill ("down-standing flange") was painted Organasol Black on the outward face of the flange. No overspray was permitted on the bottom side of the sill section.
Like I said. Maybe other Mopars did not get this treatment. But I know at least some Challengers did. I can't prove they all did of course.

Same with the top of the bulkhead. How often do you see restored Challenger R/Ts with that painted black? Not many. But it is very likely they didn't all get that either.

Plus it seems there was another colour out of that list that often got the black-out treatment too. But I can't remember what it was. I think it was the blue mentioned.
User avatar
Dave-R
Posts: 24752
Joined: Sun Apr 18, 04 11:23 pm
Location: Dave Robson lives in Geordieland
Contact:

Post by Dave-R »

After a quick look I found some "Vintage" photos of T/As. Spot the flange at the bottom. Matt black or what?

I often wonder you know.
If I were a yank that made a living painting old cars people would just except what I say without question. 15 years of research doesn't seem to mean anything. :roll:
Attachments
vintage1.jpg
vintage1.jpg (65.2 KiB) Viewed 3068 times
vintage3.jpg
vintage3.jpg (81.65 KiB) Viewed 3068 times
vintage2.jpg
vintage2.jpg (66.89 KiB) Viewed 3068 times
User avatar
Ivor
Site Admin
Posts: 13000
Joined: Sun Apr 18, 04 11:11 pm
Location: The village of Evenley

Post by Ivor »

Great shots Dave, and yep, they look matt black to me!

I think the so-called top restorers have a lot to answer for really, the old Charger I broke up for parts 30 odd years ago was astonishingly original and the finish quality was pretty poor, as was the panel fit, what's more, the underside appeared to have no paint on it at all, which was one of the reasons for its demise...but you don't find that dodgy quality in modern "factory" restos!

Also, it wouldn't it be nice to see a rock stock, bench seat, small block, manual Challenger in top nick...but who has kept one?
The pump don’t work coz the vandals took the handles.

www.ivorsroadrunner.com
User avatar
Dave-R
Posts: 24752
Joined: Sun Apr 18, 04 11:23 pm
Location: Dave Robson lives in Geordieland
Contact:

Post by Dave-R »

latil wrote:Mine has factory underseal on primer,the top coat stopped at the sills. Most of the underside has never been touched since it left the factory.
Mine was exactly the same.

Anyway. You have to admit. With everything painted black (even satin black) below the sill the car looks much better from the side than it does without.

If you look at some of the factory publicity photos of E-Bodies (and some others) you can see they have actually airbrushed out the sill flange! :lol:
Attachments
Which looks better?<br /><br />THIS?
Which looks better?

THIS?
painted satin black.jpg (77 KiB) Viewed 3046 times
Or this?
Or this?
img_1369_152.jpg (99.28 KiB) Viewed 2920 times
Last edited by Dave-R on Thu Nov 08, 07 4:37 pm, edited 1 time in total.
User avatar
Dave-R
Posts: 24752
Joined: Sun Apr 18, 04 11:23 pm
Location: Dave Robson lives in Geordieland
Contact:

Post by Dave-R »

Well this took all of 10 mins work! :thumbright:
Attachments
I drilled a 20mm hole to exit the hose and snake it over the shock.<br />Jobs done. Just need a sender unit now.
I drilled a 20mm hole to exit the hose and snake it over the shock.
Jobs done. Just need a sender unit now.
IMG_1410.jpg (111.23 KiB) Viewed 3293 times
It now goes into the rear chassis leg from the chassis connector.
IMG_1413.jpg (108.93 KiB) Viewed 3293 times
Fuel line gone from the wheel well.
IMG_1405.jpg (87.86 KiB) Viewed 3293 times
User avatar
Dave-R
Posts: 24752
Joined: Sun Apr 18, 04 11:23 pm
Location: Dave Robson lives in Geordieland
Contact:

Post by Dave-R »

Finished the fuel and oil lines. Just waiting on the fuel sender unit.

The oil cooler lines will only be visible in that opening between the front valance and bumper. The bits behind the grille will be blacked out. I don't want anything showing through the grille.

The fuel pressure regulator is angled as the hood was catching it.
Attachments
IMG_1450.jpg
IMG_1450.jpg (144.19 KiB) Viewed 3211 times
IMG_1449.jpg
IMG_1449.jpg (144.57 KiB) Viewed 3211 times
IMG_1448.jpg
IMG_1448.jpg (199.23 KiB) Viewed 3211 times
IMG_1445.jpg
IMG_1445.jpg (129.01 KiB) Viewed 3211 times
IMG_1442.jpg
IMG_1442.jpg (189.43 KiB) Viewed 3211 times
User avatar
Dave-R
Posts: 24752
Joined: Sun Apr 18, 04 11:23 pm
Location: Dave Robson lives in Geordieland
Contact:

Post by Dave-R »

Fitted the boot lid and rear spoiler.

I had to remove this as someone let all the washers for the spoiler fall inside the skin. The same person lost the special nuts for the spoiler and seems to have ripped one of the end fixings out at each end. This means the spoiler no longer sits as tight to the boot as it did but it is not far off.
Attachments
IMG_1456.jpg
IMG_1456.jpg (141.04 KiB) Viewed 3203 times
IMG_1455.jpg
IMG_1455.jpg (111.29 KiB) Viewed 3203 times
Guy
Posts: 5002
Joined: Sun Apr 18, 04 10:20 pm
Location: Behind a Camera

Post by Guy »

Dave I had to lag both the pressure and return lines to the gearbox just where they pass over the header collector as I found it was make my trans temp too high. Turbo lagging worked nicely :)
Attachments
img_1450_356.jpg
img_1450_356.jpg (194.96 KiB) Viewed 3163 times
User avatar
Dave-R
Posts: 24752
Joined: Sun Apr 18, 04 11:23 pm
Location: Dave Robson lives in Geordieland
Contact:

Post by Dave-R »

Thanks for that Guy.

I was actually going to lag those lines anyway when I re-do the trans shifter cable with something a bit neater.

I never thought of turbo lagging though. :thumbright:
User avatar
Dave-R
Posts: 24752
Joined: Sun Apr 18, 04 11:23 pm
Location: Dave Robson lives in Geordieland
Contact:

Post by Dave-R »

Seeing as how I have got around at last to painting the air cleaner lid that I made I thought I would post a photo of it. Complete with two custom "wing" nuts by our Trev-D. :)
Attachments
IMG_1582.jpg
IMG_1582.jpg (163.38 KiB) Viewed 3093 times
IMG_1581.jpg
IMG_1581.jpg (160.71 KiB) Viewed 3093 times
User avatar
Dave-R
Posts: 24752
Joined: Sun Apr 18, 04 11:23 pm
Location: Dave Robson lives in Geordieland
Contact:

Post by Dave-R »

Clivey wrote:Nice 6-Pack air filter too. You'll be getting some air in though that thing - more than I will anyhoo. :D
Something around 1000cfm. Which is a bit more than the carbs can flow.

Without the wide "skirt" around the baseplate you can really see how tall a six pack manifold is can't you? :)
User avatar
Dave-R
Posts: 24752
Joined: Sun Apr 18, 04 11:23 pm
Location: Dave Robson lives in Geordieland
Contact:

Post by Dave-R »

Felt fit at the weekend so started doing some more work on the car.

Took the dash and heater box out. Plus all the wiring. Cleaned up the inside of the bulkhead. heater box to go back in next. Then the new painless harness.

The dash needs pulling completely apart to get all the muck out before that goes back in.
Attachments
IMG_1942.jpg
IMG_1942.jpg (150.25 KiB) Viewed 2916 times
IMG_1931.jpg
IMG_1931.jpg (216.83 KiB) Viewed 2916 times
IMG_1929.jpg
IMG_1929.jpg (170.62 KiB) Viewed 2916 times
IMG_1927.jpg
IMG_1927.jpg (165.11 KiB) Viewed 2916 times
IMG_1920.jpg
IMG_1920.jpg (175.03 KiB) Viewed 2916 times
User avatar
andyrob
Posts: 4142
Joined: Tue Jun 20, 06 8:59 pm
Location: northumberland

Post by andyrob »

:thumbright: good stuff dave it about time you did some work ;) ;)
life is not a spectator sport

www.andyrobinson.eu
andy robinson

68 572 coronet RT
72 440 chrysler new yorker
69 518 daytona
User avatar
Dave-R
Posts: 24752
Joined: Sun Apr 18, 04 11:23 pm
Location: Dave Robson lives in Geordieland
Contact:

Post by Dave-R »

You were annoying me with the progress on your car mate. :lol:
User avatar
Ivor
Site Admin
Posts: 13000
Joined: Sun Apr 18, 04 11:11 pm
Location: The village of Evenley

Post by Ivor »

Good stuff Dave, you'll get there... ;)
The pump don’t work coz the vandals took the handles.

www.ivorsroadrunner.com
Post Reply