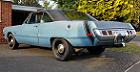
db's 1970 DODGE A108 Sportsman van
Moderator: Moderators
-
ScottyDave

- Posts: 1615
- Joined: Sun Mar 08, 15 9:38 pm
- Location: Dave Evans: MMA 130, Worcestershire

-
ScottyDave
- Posts: 1615
- Joined: Sun Mar 08, 15 9:38 pm
- Location: Dave Evans: MMA 130, Worcestershire

And so to the LAST of the bodywork on this Bus. There literally is NOTHING else to do except Waxoyl, undersea, seam seal and lacquer 
Pic 1 - Side door welded up
Pic 2 - The door refitted. I had to do some frame straightening too, which popped some spot welds. I tacked them, then Galve painted and seam sealed. Waxoyl on the inside and in all the doors.
Pic 3 - This is the ONLY rust on the whole vehicle! It's very odd, just inside the rear doors below where the spare mounts. It's like they used Italian steel just for that one little plate!
Pic 4 - Wire wheeled and Galvafroided. And that's all it's getting!
- Attachments
-
- Floor rust Galvafroid.jpg (168.39 KiB) Viewed 3721 times
-
- Floor rust.jpg (158.3 KiB) Viewed 3721 times
-
- Side door finished.jpg (175.34 KiB) Viewed 3721 times
-
- Side door welded.jpg (198.69 KiB) Viewed 3721 times
No-one will believe you...
This is a strange one.
Remove the seats and behind the interior trim card is a little triangular door.
This gives access to a horrific rust-trap running right over the wheel arch. It now has a pint of Waxoyl in it!
Remove the seats and behind the interior trim card is a little triangular door.
This gives access to a horrific rust-trap running right over the wheel arch. It now has a pint of Waxoyl in it!
- Attachments
-
- Front wheel arch cavity.jpg (175.12 KiB) Viewed 3718 times
No-one will believe you...
I've done loads I've not reported here yet, but the current job is to build a towbar mount...
I've tacked it but it'll be going to Dan for full welding. I'm also adding struts to carry some of the load along the chassis.
I've tacked it but it'll be going to Dan for full welding. I'm also adding struts to carry some of the load along the chassis.
- Attachments
-
- 4 Towbar ready to weld.jpg (193.04 KiB) Viewed 3680 times
-
- 3 Drilling towbar plates.jpg (212.32 KiB) Viewed 3680 times
-
- 2 Tube tacked.jpg (218.65 KiB) Viewed 3680 times
-
- 1 Making mount.jpg (210.8 KiB) Viewed 3680 times
No-one will believe you...
-
ScottyDave
- Posts: 1615
- Joined: Sun Mar 08, 15 9:38 pm
- Location: Dave Evans: MMA 130, Worcestershire
So one job I've been putting off is the vibration from the prop.
I'd replaced the rear UJ but the front is a ball and trunnion joint (also called a Detroit joint as I found out) It had play in it causing the vibe and you can't buy replacements.
So, I either have the prop rebuilt still with a flange end but with a UJ and slip joint. Dunc suggested that as the trans needed a rebuild (whining like an electric milk-cart in 1st) that he'd swap the tailshaft casing for a longer one and fit a splined output shaft. Then I just needed to get the prop chopped and a splined end grafted on.
Oh, and make a new trans mount.
- Attachments
-
- 03 New trans mount.jpg (179.3 KiB) Viewed 3632 times
-
- 02 Trans out.jpg (219.03 KiB) Viewed 3632 times
-
- 01 Tailshaft case.jpg (197.93 KiB) Viewed 3632 times
No-one will believe you...