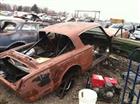
Slowly making progress.
I found two of the torque converter bolts were loose. Non of them had thread lock on them. They have now.
Both accessory belts were too small. But I found that the belt on the alternator and fan was actually the correct one for the power steering pump. So just needed a new longer alternator belt. Slightly easier to see the timing marks now which I have also painted to make more visible.
I have started going through the brake system. Thought I would start at the master cylinder and work round from there.
Fluid was missing completely from the rear brake side so I have an issue down that line. But the fluid for the front brakes was black as soot which is strange considering it's got a fairly new disc conversion on it.
So I removed the MC and stripped it apart to check the piston seals were not damaged or something. Everything looks fine. I painted and bench bled it and everything is working as it should there.
So that's back on the car and I am making new lines from it as the existing were routed in my way when I was trying to access the starter motor wiring.
Next up I am stripping the front brakes.