I find a heat gun works a treat!
Dave999's Aussie Charger
Moderator: Moderators
-
Stu

- Posts: 6918
- Joined: Sun Jul 31, 05 4:15 pm
- Location: Shropshire, home of the worlds smallest big screen TV
Re: Dave999's Aussie Charger
I like a bit of wrinkle, me. 
I find a heat gun works a treat!
I find a heat gun works a treat!
24 hours in a day, 24 beers in a case. Coincidence? I think not…
70 Challenger
MMA/489
NSS/435
70 Challenger
MMA/489
NSS/435

Re: Dave999's Aussie Charger
well after the clutch fun i got the car to the HRDs
after some work on the carbs, float level adjusted again, and a 3 size jump in air correctors running really good
did a blast down the quater went faster but took longer
drove it home
so pleased with the way it ran and incresed confidence led me to drive it to work on the following Tuesday, usual mix of standing traffic and chaseing Audis around the M25
on the way home a large puff of smoke out of the stering column below the crush can!!!!.
A strange noise like frying bacon...!
Then the car filled up with dense white smoke via the gearstick hole and somewhere under the dash
i was quite perturbed. Landed on the hard shoulder J16-15 AC M25 and armed my self with the fire extinguiser
bonnet warm to the touch
view through the grill showd no dancing flames
popped the hood to find a huge quantity of coolant all over the place the spark plugs were swimming the steering box and igntion were soaked
the exhaust gearbox and bellhousing was covered in prestones finest. hence all the smoke
windy rainy night
Short sleaved shirt, no coat
Busy M25
no emergnecy flashers
but i did have camping chair and a pair of overalls for just this kind of occasion,
and a familiy sized tent (no space for that)
so once my heart rate returned to normal, I set up camp under the kew gardens sign and used the camping chair bag as a hat to direct the rain over the back of my seat
called RAC
said Head Gasket which was my best guess
they said you have no MOT
i said i don't need one
they said we'll send somone
i said send a truck
they said yes or course sir anything you say.....hahahahahaha
1.5 hours later
call from RAC, its a man in a van in walsall. why are you calling from walsall? he said i have no idea why its been allocated to me, he agreed that it was probably cylinder head gasket and updated the ticket from "send someone from walsall to fix it" to "send a flatbed "
2 hours later a guy who had been somewhere up the A1 picked me up took him an hour from the M25 A1 junction....
How long you been waiting mate? 3.5 hours Ohhhhhhhhh ...........
broke down 5:45 drove it into the garage 22:30
can't fault the service, once it arrives, but a Male with a bag on his head, and a large car that nobody knows what its is, isn't a priority
Anyway
filled engine to the brim
no leaks overnight so presume not a core plug out
all looked great no obvious problems, radiator ok, Cap ok, top and bottom pipes ok, radiator drain tap ok engine turned over by hand OK......
bizzare
But i haven't taken a day of work to spend it all looking at an engine that looks ok.
off came the carbs exhaust head
hours of cleaning. 2 litres of brake cleaner.... is an old holey vest a lint free cloth? i dunno, but when it stayed white, i'd cleaned enough getting to that point takes a very long time.
3 foot straight edge applied, granted its from wickes so probably not as straight as necessary.. proper one is 100 quid. can't get my 0.002 feeler under the ruler across any of the bridges between cylinders. preumeing not warped
can't see any cracks
took out some shares in copperkote and a "used once" MLS gasket from the spares pile
and on it went again. ARP snot on stud threads, nuts and washers, and torqued in 3 stages
just got to put back induction and exhaust dump oil and coolant a refill and will be good to go
yes there is a chance this won't work
Got a monotorque gasket coming for a potential re run in the autumn season....but hey the MLS cost me a fortune.
there are times when i'm not that fond of this car
what an adventure
Dave
- Attachments
-
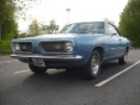
- back to where we started or is that the same photo i dunno
- IMG_0565.JPG (79.92 KiB) Viewed 17053 times
-
- clean? clean... not the chambers the gasket face. Not a hemi, but a Semi
- IMG_0564.JPG (97.12 KiB) Viewed 17053 times
-
- That'll do.... looks worse than it is
- IMG_0563.JPG (80.31 KiB) Viewed 17053 times
-
- after the first going over razor and steel ruler to remove stuck gasket face
- IMG_0562.JPG (88.6 KiB) Viewed 17053 times
-
- Start
- IMG_0561.JPG (48.79 KiB) Viewed 17053 times
-
- Not Happy but keeping myself amused, read the whole internet
- IMG_0555.jpg (39.04 KiB) Viewed 17053 times
The Greater Knapweed near the Mugwort by the Buckthorn tree is dying

Re: Dave999's Aussie Charger
I’ve just read that twice. Hahaha oh man - ‘man with a bag on his head’. I love the idea you just set up camp.
That would take me a season to sort that out. Kudos to Dave as always - rip it apart, get at it…
That would take me a season to sort that out. Kudos to Dave as always - rip it apart, get at it…
"Cum homine de cane debeo congredi." Woof.
Current Charger status - "Working !"
Current Charger status - "Working !"
-
Stu
- Posts: 6918
- Joined: Sun Jul 31, 05 4:15 pm
- Location: Shropshire, home of the worlds smallest big screen TV
Re: Dave999's Aussie Charger
Bloody hell Dave. 
You know, if I’d have heard a National news report of a man with a bag on his head setting up camp on the motorway veiled in a dissipating plume of smoke, there’s a good chance I’d think to myself…
I bet that’s Dave…

You know, if I’d have heard a National news report of a man with a bag on his head setting up camp on the motorway veiled in a dissipating plume of smoke, there’s a good chance I’d think to myself…
I bet that’s Dave…
24 hours in a day, 24 beers in a case. Coincidence? I think not…
70 Challenger
MMA/489
NSS/435
70 Challenger
MMA/489
NSS/435
Re: Dave999's Aussie Charger
needs must when its chilly mate 
It may not have been a gasket problem
i still have no clue where the coolant got out
interface between head a block at the back was soaking with boiling coolant down the side and up around each plug and obvioulsy i didn't want to hang about checking stuff on the hard shoulder whilst recovering from the shock that i may well be on fire.
but i was doing 60-70 mph enough to make water go up as well a down
But none of it ended up on the screen....very odd
wost case scenario is a massive crack somewhere, but its not obvious
if it is i've got a spare one or two of everything, so we'll see.
what i will do is buy a new coolant temperature sender the one on there is potentially 52 years old....
think my issue can probably be traced back to my tirp to the NATS last year a flakey igntion module, that finally failed on the way to last years HRDs caused what can only be described as the loudest backfire i have ever heard, i stopped tro see if i had blown apart a carb or header, was like a gun going off.
But, Managed a good few journeys since
Mmmm i'm nervous, i'm sure there is more to this, i guess all will become aparent.
Dave
The Greater Knapweed near the Mugwort by the Buckthorn tree is dying
Re: Dave999's Aussie Charger
all back togther,
running better than before. so pleased about that
no idea why, all i did was take it apart and put it back... quick clean and re gap of the plugs that's all
why this has made a seat of the pants difference i wish i knew why.
took it out for a 45 minute run....no issues apart from the horn and wipers have packed up ...... presume a wash down in antifreeze didn't help.
Got back popped the hood and found both heater tubes slightly ballooned at the point where they enter the heater with a dewy like covering much like an advert for fresh fruit....Oh no.
man handling the pipes produced a bigger exit of coolant
placing them back and it stopped some what.
AAAAAAAAARRRRRRRRRRRGGH ugh etc etc well.... no..... i can't print what was actually uttered.
when cold no indication of an issue hard rubber pipes with some flexibility but set in position.
These pipes have a longitudinal ribbing as standard so no visible perishing. No staining nothing
When warm seem fine idle it for 1/2 and hour to get it warm, stat open, no problem, pipes are a bit more bendy, but no indication of leaking
When exceedingly hot seem to turn to sponge and allow coolant to well out from the center of each rib.
when bent from natural resting place lots of liquid....
now this is probably the cause of the issue. Or has it been caused by the undoubted overheating and steam production when i got stuck in the first place... either way i'm kicking myself
i can imagine if the pressure and temperature was higher a considerable rain storm would occur under the hood
and given that on 2 occasions previously i have dissapeared coolant with no indication as to where it went on very hot days, in very slow traffic....
selectively leaky spongy pipes might have been the problem all along.
i can't understand why a leaking pipe doesn't splatter the screen, yet a leaking radiator cap does....
when you bend a pipe to check its ok you bend it. you can't bend it the the other way to see if the grooved pattern along its length is hiding anything.
given that these pipes were made for approx 4 years in the 1970s, by one Aussie manufacturer i should have known, They could be 50 years+ in age or be crap repros but either way. should have thought.
new pipes 3 meters of 5/8 purchased... job done
and i retreated back into the house to curse the fact that i all i did was run it up to warm, before i started on this gasket replacement route
Far too hasty. wrong assumption, regardless of previous suspicions, leads to two days work that were not necessary
a good example of starting the work not liking the car, with your head in the wrong place. This leads to mistakes. act in haste repent in leisure
BUT on the + side
has resulted in a motor that goes just a little bit better... i must admit i was smiling on my return from another quick blast yesterday managed to scare myself in the wet ...
I guess I live and learn...
Dave
running better than before. so pleased about that
no idea why, all i did was take it apart and put it back... quick clean and re gap of the plugs that's all
why this has made a seat of the pants difference i wish i knew why.
took it out for a 45 minute run....no issues apart from the horn and wipers have packed up ......
Got back popped the hood and found both heater tubes slightly ballooned at the point where they enter the heater with a dewy like covering much like an advert for fresh fruit....Oh no.
man handling the pipes produced a bigger exit of coolant
placing them back and it stopped some what.
AAAAAAAAARRRRRRRRRRRGGH ugh etc etc well.... no..... i can't print what was actually uttered.
when cold no indication of an issue hard rubber pipes with some flexibility but set in position.
These pipes have a longitudinal ribbing as standard so no visible perishing. No staining nothing
When warm seem fine idle it for 1/2 and hour to get it warm, stat open, no problem, pipes are a bit more bendy, but no indication of leaking
When exceedingly hot seem to turn to sponge and allow coolant to well out from the center of each rib.
when bent from natural resting place lots of liquid....
now this is probably the cause of the issue. Or has it been caused by the undoubted overheating and steam production when i got stuck in the first place... either way i'm kicking myself
i can imagine if the pressure and temperature was higher a considerable rain storm would occur under the hood
and given that on 2 occasions previously i have dissapeared coolant with no indication as to where it went on very hot days, in very slow traffic....
selectively leaky spongy pipes might have been the problem all along.
i can't understand why a leaking pipe doesn't splatter the screen, yet a leaking radiator cap does....
when you bend a pipe to check its ok you bend it. you can't bend it the the other way to see if the grooved pattern along its length is hiding anything.
given that these pipes were made for approx 4 years in the 1970s, by one Aussie manufacturer i should have known, They could be 50 years+ in age or be crap repros but either way. should have thought.
new pipes 3 meters of 5/8 purchased... job done
and i retreated back into the house to curse the fact that i all i did was run it up to warm, before i started on this gasket replacement route
Far too hasty. wrong assumption, regardless of previous suspicions, leads to two days work that were not necessary
a good example of starting the work not liking the car, with your head in the wrong place. This leads to mistakes. act in haste repent in leisure
BUT on the + side
has resulted in a motor that goes just a little bit better... i must admit i was smiling on my return from another quick blast yesterday managed to scare myself in the wet ...
I guess I live and learn...
Dave
The Greater Knapweed near the Mugwort by the Buckthorn tree is dying
Re: Dave999's Aussie Charger
DOH!! 
at least you didn't find it on the motorway
neil.
at least you didn't find it on the motorway
neil.
Re: Dave999's Aussie Charger
exactly don't wanna be doing that again...every cloud etc
The Greater Knapweed near the Mugwort by the Buckthorn tree is dying
Re: Dave999's Aussie Charger
cloud with a silver lining? or cloud of smoke, lol.
Re: Dave999's Aussie Charger
Trying to fix up the de mist and aircon unit vents
Plastic manifold on the car is the wrong one. It's too fat and won't allow fitment of the diffuser
The thin one necessary for the job is in a right old state
They are polypropylene. I.e. pretty awkward to glue
So I chopped up the fat good one, and plastic welded a chunk of it to the thin one
Ugly. Very ugly. But robust
ill sand down the mess later
Dave
- Attachments
-
- IMG_0648.jpeg (116.37 KiB) Viewed 11237 times
-
- IMG_0657.jpeg (160.33 KiB) Viewed 11237 times
-
- IMG_0656.jpeg (164.92 KiB) Viewed 11237 times
The Greater Knapweed near the Mugwort by the Buckthorn tree is dying
Re: Dave999's Aussie Charger
you could now wrap it with self amalgamating tape for that proper 'belt and braces' finish, lol.
neil.
neil.
Re: Dave999's Aussie Charger
a long time ago (2003) in a galaxy far far away
i drove west from Sydney down the parramatta road and got lost in suburbia land...
i met a man who sold me an aircon/heater unit and the heavy weight metal and plastic vent/diffuser for a H51 RHD car
he also sold me a screen and some other gubbins a load of bits of dash lighting etc
i did some work in my underground sydney garage, which involved turning the aircon box into a box of spares which i have never used.....
the aim was always to get the push button unit and the under dash stuff working even if i didn't have the under hood stuff to go with it
at least i'd have demist and an ability to switch off the heater..
well finally finished that job 20 year later
the repaired plastic manifold (above) went on
i could then fit up the diffuser under the dash. its heavy...!
remount my lambda gauge on the bottom of it
next i fitted some small plastic vacuum T pieces that i got from china into the red and white vacuum pipes, replacing what was crumbling, and re plumbed in the tubes through to the engine bay
whacked the black one onto a vacuum port on a carb
and started it
mouthful of 20 year old leaves later all good
all vacuum activators are lazy
one might not work
but i can now have hot feet hot face or hot screen....
success
Dave
- Attachments
-
- IMG_0661.jpg (80.07 KiB) Viewed 9529 times
The Greater Knapweed near the Mugwort by the Buckthorn tree is dying
Re: Dave999's Aussie Charger
good work Dave
Re: Dave999's Aussie Charger
here are some pictures of the stuff i nearly did but then didn't
i.e a lot of messing about
illustrated below
An australian t5 tail housing, modified by removing the shift rail tunnel and putting nice bushes and seals in the cut off ends left behind, and a nice bent shift rail to clear the cross member.
BUT the speedo housing/cable/drive and cross member wanted to share the same space when installed
SO
I modified a chevy camaro t5 tail housing in the same way. they have the speedo drive in a different place.
used the same bushes and seals and a nice bent shift rail
Much the same housing as the aussie one apart from a chevy shifter gate/detent plate and a stupid offset by 25 degrees rear mount.
All looking good, got the thing more or less ready to go.....NICE.
But the tail housing tunnel is so narrow and it has a flat roof from halfway down. it can't contain anything but an original chevy gear, mounted on an original chevy output shaft with a tiny spring clip. I don't have a Chevy output shaft on a Ford T5. Hence the aftermarket gear and adapter i have won't fit the tunnel this far back.... aaaaaaargh the replacement gears only fit in if they are further up the output shaft like on a ford box.
SO
i got Chevy S10 housing same shifter as the camaro, well at the base a least. but this time right up front.
put in box and then you can cut a hole in the tunnel in front of cross member.... all will be well. Honestly it will.... The speedo gear adapter fits, along with a chevy gear, and doesn't lock the output solid once the tail shaft housing is bolted down.
Yay!
put it in
the fat 19mm bellhousing adapter i purchased to get the australian tail housing to line up with the rear mount is too thick.
i need the box forward 8-10 MM hence need a steel bellhousing adapter of 6-8 mm
it pushes the s10 shifter box back into the double skinned section just in front of the cross member hoop....
too much money spent on stupid plans this year
fergodsake
so i gave up again
and
because i'd pulled out the close ratio 4 speed back in february
I decided on a change
I refreshed the wide ratio 4 speed
cleaned it all up, inside and out, layshaft pushed back lowered secondary gears pulled out input shaft, bearing off and cleaned, inside input shaft rollers checked greased up and back
checked all the gears main and cluster
checked clearance on the syncros
all good.
took shifter housing to Cramers in watford to be re-bushed 3 weeks ago... heard nothing...as per usual..... so swapped the one off the close ratio box across, which i didn't want to do they kind of wear into the job they do ally housing with oilite bushes mix n match is not good.
aligned it on the wide ratio box. new plastic button and saddle on the gearstick (like a type e ford rocket box shifter) and shoved the wide ratio box in
Back on the road 9 steps forward 9.5 back...
working on a plan
Dave
- Attachments
-
- The Cut off Shift rail housing on the Aussie Tail front
- IMG_0733.jpg (114.17 KiB) Viewed 27 times
-
- Cut off housing Aussie tail rear with the speedo drive hump in front. Right in the wrong place
- IMG_0734.jpg (60.67 KiB) Viewed 27 times
-
- Fat adapter has Ford dagenham pattern for bell and Ford T5 for box. i bodged it onto a 3 speed bellhousing for an Aussie 3 speed box
- IMG_0735.jpg (82.06 KiB) Viewed 27 times
-
- 3 speed bell and other side of adapter
- IMG_0736.jpg (75.99 KiB) Viewed 27 times
-
- Aussie housing left T5 middle S10 housing right
- IMG_0732.jpg (93.72 KiB) Viewed 27 times
-
- Aussie housing illustrating frustrating speedo drive bulge
- IMG_0731.jpg (93.57 KiB) Viewed 27 times
-
- Chevy Camaro housing with new shift rail set up note the offset rear mount and better position for speedo drive
- IMG_0730.jpg (90.68 KiB) Viewed 27 times
-
- Chevy camaro housing close up. need to make new bush
- IMG_0741.jpg (87.74 KiB) Viewed 27 times
-
- Compare the chevy camaro with the chevy s10 stick position. note the 21 degree offset to the rear mount on the camaro...what a Pain in the as that is
- IMG_0742.jpg (96.61 KiB) Viewed 27 times
-
- Borg warner single rail australian 4 speed close ratio with shifter cup removed. This is A small, Steel cased Toploader. good for 285-350 Ft/lb depending on ratios and it fits an Early A Body auto trans, floor/tunnel with no modification other than a hole for the stick... why am i making my life so hard :)
- IMG_0744.jpg (158.15 KiB) Viewed 27 times
-
- spruced up wide ratio borgwarner single rail 4 speed with shifter cup added note kinked linkage which was inspiration for the T5 plan in the first place
- IMG_0745.jpg (110.35 KiB) Viewed 27 times
-
- Aussie housing with the nylon bush i made and the seal installed. the scroll section next to the main tunnel is flat. so this is a world class housing
- IMG_0740.jpg (67.29 KiB) Viewed 27 times
-
- seal pressed in
- IMG_0739.jpg (101.64 KiB) Viewed 27 times
-
- Map gas torch a jack handle and a length of 12mm steel rod and i made a new shift linkage. next move was to buy something to join it up
- IMG_0738.jpg (86.73 KiB) Viewed 27 times
-
- adapter in place
- IMG_0737.jpg (54.45 KiB) Viewed 27 times
The Greater Knapweed near the Mugwort by the Buckthorn tree is dying
Re: Dave999's Aussie Charger
if the only issue was the speedo housing wanting to be in the same place as the crossmember on the aussie tailhousing why not alter/remake the crossmember for clearance? surely that'd be easiest, unless there were other issues you didn't mention here.
neil.
neil.