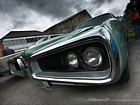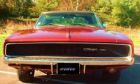
It's a 1971 Challenger Convertible, I've owned (and driven!) it since 1985. (Hang on, I hear you say, you must have had this car when you were twelve!!
Me and my friend Adrian (Red Barra-n) toured the US in 1985, doing drag races etc, and I went with a couple of grand (a loan right after I graduated!!) to buy a big block Challenger. We went to the Mopar Nationals (which was in Ann Arbor then!) but I couldn't find one at my price (even then!) so I returned to the UK to keep my eyes on Exchange & Mart!! Just a couple of months later a convertible appeared for sale, I could hardly believe my luck since a convertible Challenger was my ultimate car, but since they made so few I was expecting to get a hardtop. The price was right (it had a lot of rust) so it was mine!!
Here’s a pic around 1987 or so!

It was an original Slant 6 car, which at some stage had been tarted up somewhere down South (it was sold through Dowsett Motors in Portland). They had recovered the interior in cloth (good job), resprayed from original Hemi Orange to a BMW burgundy (yuk, plus loadsa bondo), and dropped in a 2bbl 360 from an Aussie CH Chrysler. BTW, if anyone has any more info on the early days that would be great to know, and/or any pics at all.
I figured it would be pretty easy to drop in a big block, though over the years later came to decide that a hot smallblock would be a nicer all round package, and a path less travelled.
I was still living with my parents so it sat outside in the road in all weathers - I recall brushing 3 inches of snow off it, and also getting snowed on as I lay underneath making a dual exhaust!
Anyway, from Day 1 it was always the plan to fit a decent engine and tear up the strip, but with all the other stuff that needed doing, plus the rest of life to live, it always seemed to be at the bottom of the list. Not to mention the money factor too, I got married in the meantime and consider myself VERY fortunate to not have sold the car at the time! So I spent many years enjoying the car, with some interim 'off the road' periods while I gradually improved it. Things like putting on a new convertible top, and welding in a fair bit of new metal here and there, just to name a couple………


Went to many shows as a spectator (in the car whenever possible), but never ‘showed’ the car (i.e. parked in public car parks etc) since it was so tatty. However, I eventually realised that, just like me with other peoples cars, most Mofans like to see Mopars whatever the condition!!
Here’s a pic at the 2000 Euronats

Finally a few years ago we were in the position to do a proper job on the rust. I'd been collecting panels for years and years, and fully intended to do all the body and paint work myself. However, much against the grain, I realised that although I had the tools, I would NEVER have the time to do the huge amount of bodywork required, so I farmed it out. It eventually became obvious that for a proper job I'd pretty much need to strip the entire car, so over Christmas I disassembled it completely (I do mean completely - not a single nut or bolt remained), recording the details on hundreds of digital photos so I knew how to put it back together!!
A few pics of the disassembly and general rusty nature!!


No, NOT my handiwork


OK, not long after bodywork started in earnest. Despite a few intense ups and downs, it was definitely the right move to outsource the bodywork, it took the guy 3 months full time, working long hours to do it. The whole car was sandblasted, underneath and all. That wasn’t the plan but once we’d agreed to blast it, it was almost as easy to have the underside done. So I ended up with a painted bottom


I was busy in the meantime, amongst other things putting a fibreglass hood on my old original hood bracing, and the doors – I decided to weld in my old door inners to my replacement doors since they had some mounting points cut out and my inners had more factory reinforcing on them


New (or rustfree used) sheetmetal included...... bootlid, 2 doors, 2 front wings, rear floorpans, rear quarters, cowl, trunk floor, trunk extensions, rear wheelhouses….are you getting the picture!?? It took me a lot of time and a fair bit of money to collect all of those over 15 years!
Anyway after a long haul we got to paint……


So I've been reassembling and rebuilding the rest of the car ever since, I've still got a long way to go. I've been working on cars since I was 16, and yet it STILL amazes me how long things can take. Even with all that experience I still hopelessly underestimate the time and energy it takes, especially when you are a fussy git like me - I have to get it exactly how I want it!!
Anyway, the new engine is a 340 stroker! At the time I spec’d it and bought the engine parts there were no other SB strokers over here (in fact, I'm amazed there are still so few). I bought all the parts remotely in the US, and found a used block and had it machined over there too to save money (but not time). This is a recurring theme with this car by the way. I've got great value for money, mainly because a project of this size is expensive whatever way you look at it, and the only way I could undertake it is to get the absolute best bang for the buck - very little splashing out. After an initial disaster, I bought a set of secondhand W2 heads which will go great with this engine. They've been ported and I have the flowbench data to show they flow over 300cfm, which is more than enough for my needs!! I've got H-beam rods and custom CP forged pistons which are really nice pieces.


As far as the body was concerned, I unfortunately had to spend a huge amount of time touching up the paint underneath the car. Although the paint job was very nice, the sandblasting underneath should really have been done better, and a lot of the nooks and crannies underneath had really been painted over dirt and grease, or even not painted at all. Here are just a couple of examples


Most of it was fine, but due to my paranoia about rust returning, I've went over every square inch of the underside and either painted it where it was missing or thin, or stripped it off and repainted where it wasn't done right. Lesson for all - if you are getting car blasted, make sure every bit is properly stripped, I would gladly have paid for another day if it meant missing all this work!
It's all for protection rather than cosmetics - no-one will ever see most of it!
Anyway, here's one example, the radiator yoke. While I was at it I noticed that the whole rad crossmember had been knocked back, and was all a bit skewed, so I fixed that with a length of angle iron, steel blocks, and lots of leverage - took courage I can tell you - I had to do it carefully due to my lovely fresh paint surrounding it all. Also, here's my low buck device which worked flawlessly to straighten it out some of the creases and dents!

Some in-progress and finished shots


 .
.Here you can see the finished yoke - the blue tape are all bits that still needed touching up!! (though now all done)

Also did front Chassis rails at the same time. Here's an in- progress and finished pic

Next was the heater plenum (i.e the inside of the cowl), I've sealed the whole seam (tough to get to) and painted the floor of it, again all to keep the rot at bay, mine rusted out here before bigtime, as the previous pictures show.
Other stuff I did was finishing the K frame and LCA's. I already reinforced the K-frame in all the right places, and seam welded it all the way round. Here are the plates I made and welded in.

And here are a few pics of the finished bit.


Next was making some sway bar tabs. I can tell you it took a long time getting all the measurements from photos, and making up templates. I'm pleased with the results though, finally finished them and welded on to LCA's. Here are the tabs, and my mocked up sway bar assembly.


I also welded on the LCA reinforcements underneath as you can see.

Next I made a deep oil pan! Yes, I know buying one would be quicker, but like everything I either can't get one, or what I can get doesn't fit my needs! Most of the deep pans hang too low, I want one that is not really below the K member - ground clearance is a priority on this car in case I lower it a bit, especially with all the speed bumps in this country GRRR, hence the TTi's etc.
Here's my new stock pan mocked up. I assembled the K member then got out my headers and PS box to make sure where I had clearance.


Here's the finished oilpan, holds over 2 quarts extra without hanging below the K-member


It took me over a year of work to finish off the paint, for the reasons above!!
Next made up all new brake lines, following the originals pretty closely. I also took the opportunity to fit my new disc brake calipers (was drums originally) and master cylinder, plus plumbed in my line lock and proportioning valve


More recent jobs have been refurbing the rear lights……..


……and wiring harness, and also working on the fuel system. I converted my sender to half inch line, and made up a whole new set of lines in aluminum, I'm pretty pleased with the result. Also refurbed the tank, made a real mess of the garage getting all that external rust off (inside is as good as new!). Because of the mess I made derusting it, and since I needed to contain any painting I did, I decided to make up a mini collapsable booth in the garage. I put an extract on it for a vaccuum cleaner, and an intake filter (Focus Diesel!!) to get fresh air through. Worked very well for both sanding stuff and painting, and it collapses away to take up very little room. Result.


The booth!!

Next was the heater box. The original was in a right state, rusty and all the foam was dust, so I disassembled the whole thing, blasted and painted all the air doors, painted the motor, and reassembled with new foam, gaskets, caulking, and heater core. Should function a whole let better


Also required was a wiper motor overhaul - this one came apart completely, deriveted, stripped all the parts cleaned, primed, painted, regreased, and reassembled, then tested, all works well.

Next step was rear mounted battery. Wanted it to look almost ‘factory’, so all the wires are concealed or wrapped as factory wiring. Made up a bracket to house fuses, starter relay, disconnect switch, and battery vent through floor (using my old fuel sender outlet!), all using the original mounting holes and position of the fuel vapour separator, which I decided not to reuse. Very pleased with this all-in-one!


Made battery tray to fit in place, neatly clamped from bottom.


The starter cable will only ever be live during cranking. You could accidentally slice it in two and nothing would short out or burn. Mind you, I’ve armoured it anywhere it is vulnerable anyway. Put a lot of thought into the routing and it should work great – again, no extra holes made!! Uses the redundant firewall hole for 4-speeds, and the wires come out in just the right place.
Next I installed new firewall insulation, the recon’d heater box, pedals, fresh air vent, washer pump etc etc, all rebuilt.


Looks a bit different now to when I took it apart!

Next on the list were refurbing the horns and the voltage regulator. Not too difficult, though still takes time. My sandblast cabinet is great though. £85 off Ebay and works a charm. Always wanted one. ….


Current situation is fixing the door handles. Need to tart ‘em up a bit cos they were a bit tatty.
Also, when I bought the car it had a ‘repaired’ drivers handle (steel handle and not the right size) and a broken passenger’s (no handle). E-Body handles are prone to this. Many years ago I got a secondhand pass handle, so I’m left with an incorrect drivers side, a working passengers handle, and a ‘spare’ broken pass side handle that was in the glovebox when I bought it.
Hmmm, I thought, I wonder if I can combine the broken pass handle with the incorrectly repaired drivers handle to get a working ‘correct’ one…….so that’s what I did, pretty happy with the result!!


Also recently got loads of stuff powder coated, looks great (with a couple of exceptions that they hadn’t properly done), so I’m starting to get more shiny new stuff and less rusty old stuff.
Also disassembled steering column and a bunch of other stuff.

Anyway, obviously these are not all the jobs or this post would be twice as long as it already is, but should be enough to give you an idea!! At least those of you who can’t remember my car on the road can now confirm that it does indeed exist, and is, slowly but surely, making progress!
Phewwww…..that’s it for now, will try and keep this a bit more current from now on!!