Will´s 1968 Dodge Charger
Moderator: Moderators


-
autofetish
- Posts: 5599
- Joined: Sat May 21, 11 6:43 am
honing with the torque plates  thanks
The honing plate is a metal plate that simulates the head being bolted on.
As you tighten the head down the cylinder walls desort and changes shape.
So its important to use this. Learn somthing new every day
<a href="http://beta.photobucket.com/" target="_blank"><img src="http://i73.photobucket.com/albums/i205/ ... kplate.jpg" border="0" alt="Photobucket"></a>
So
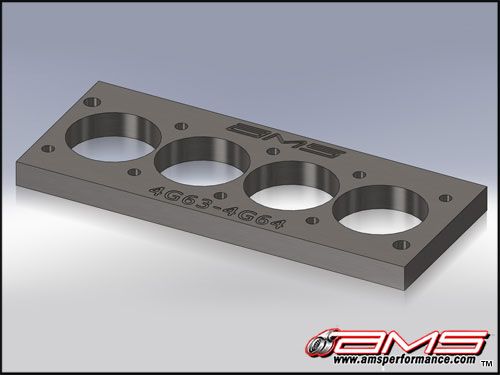
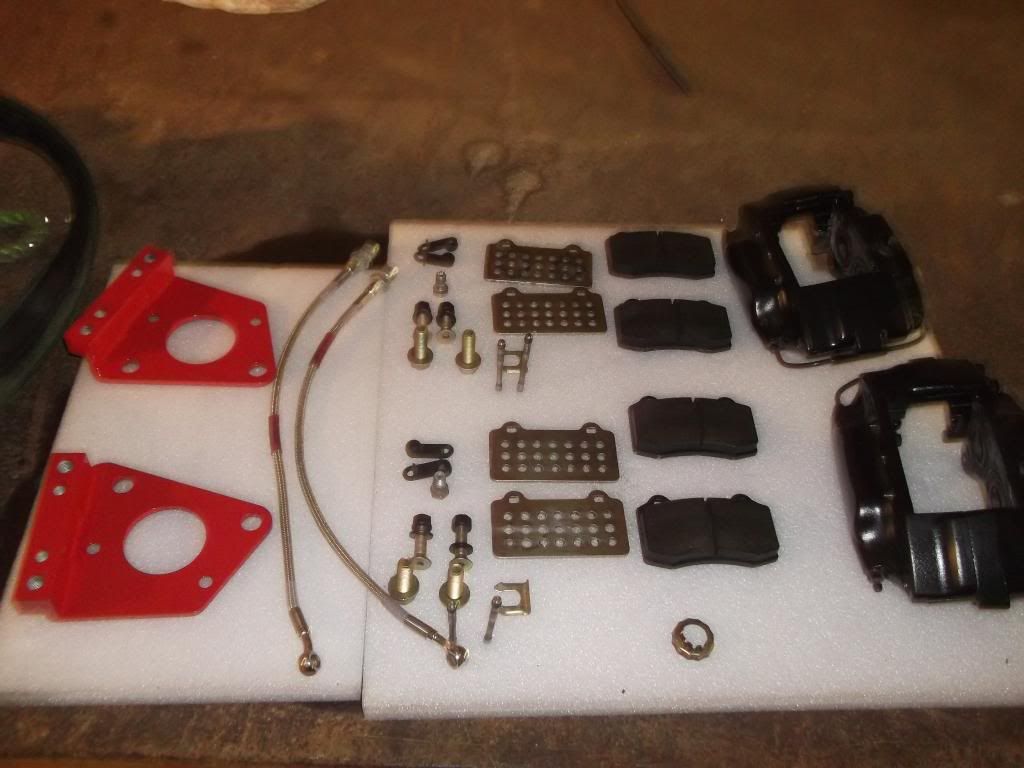
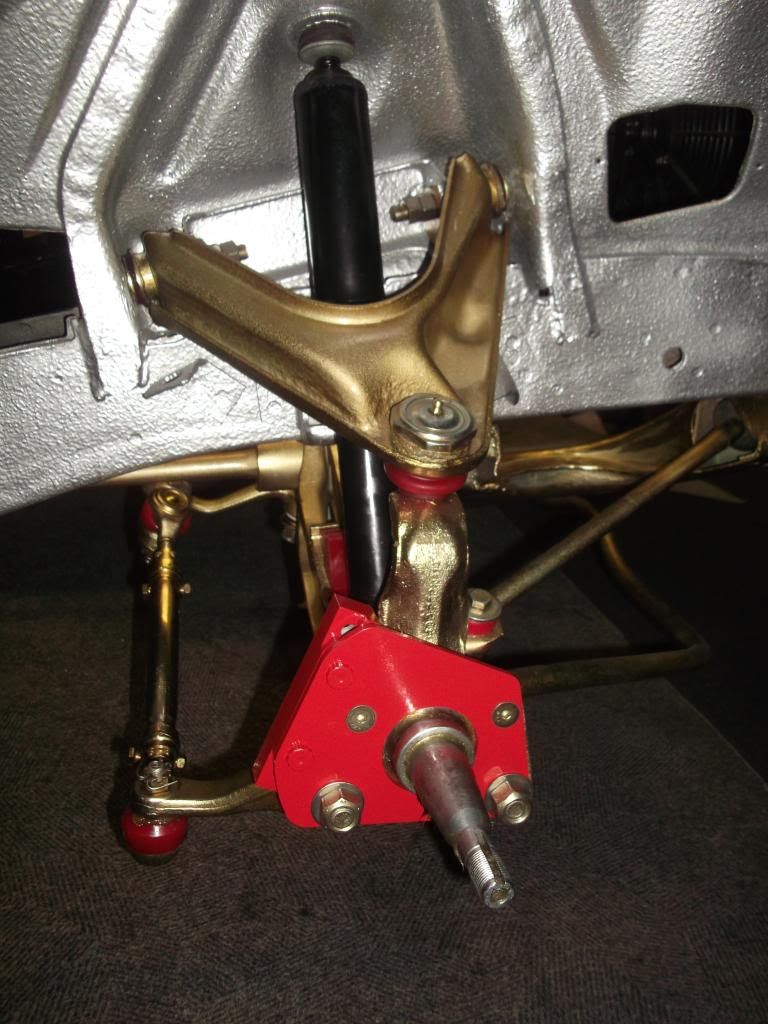
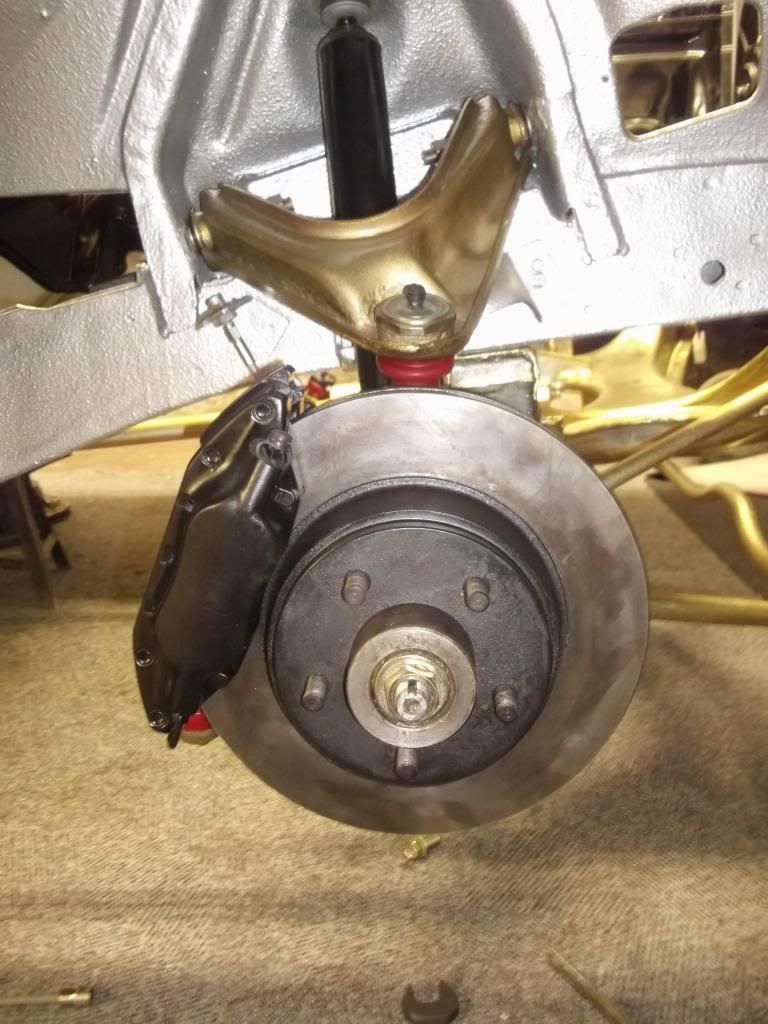
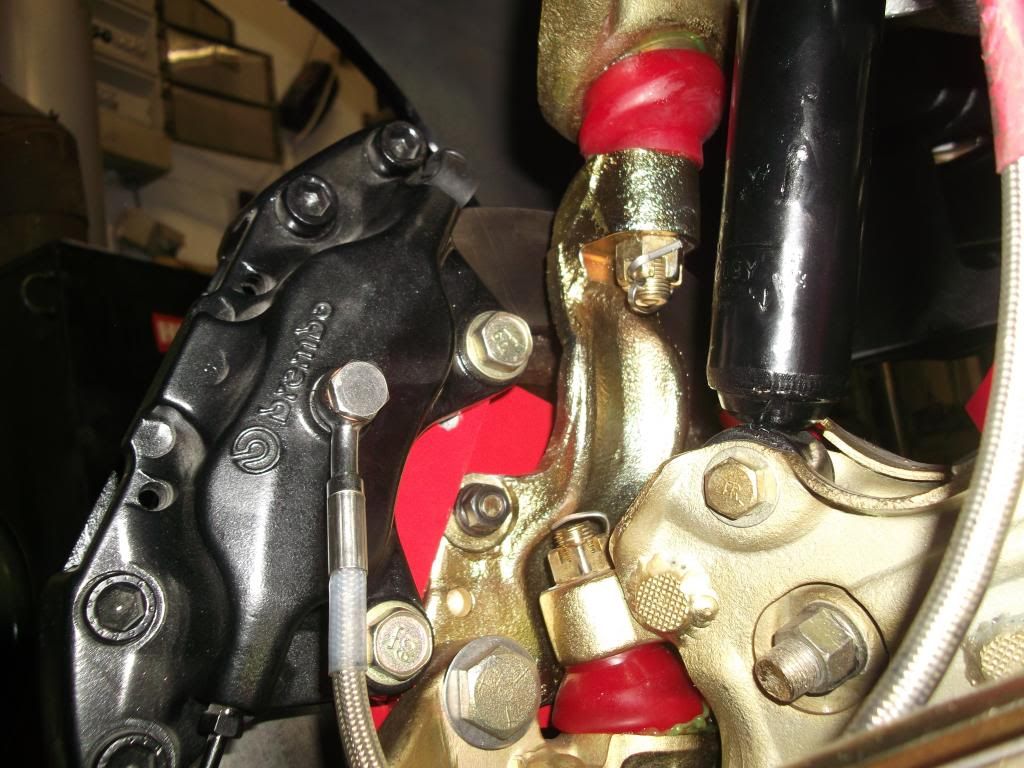
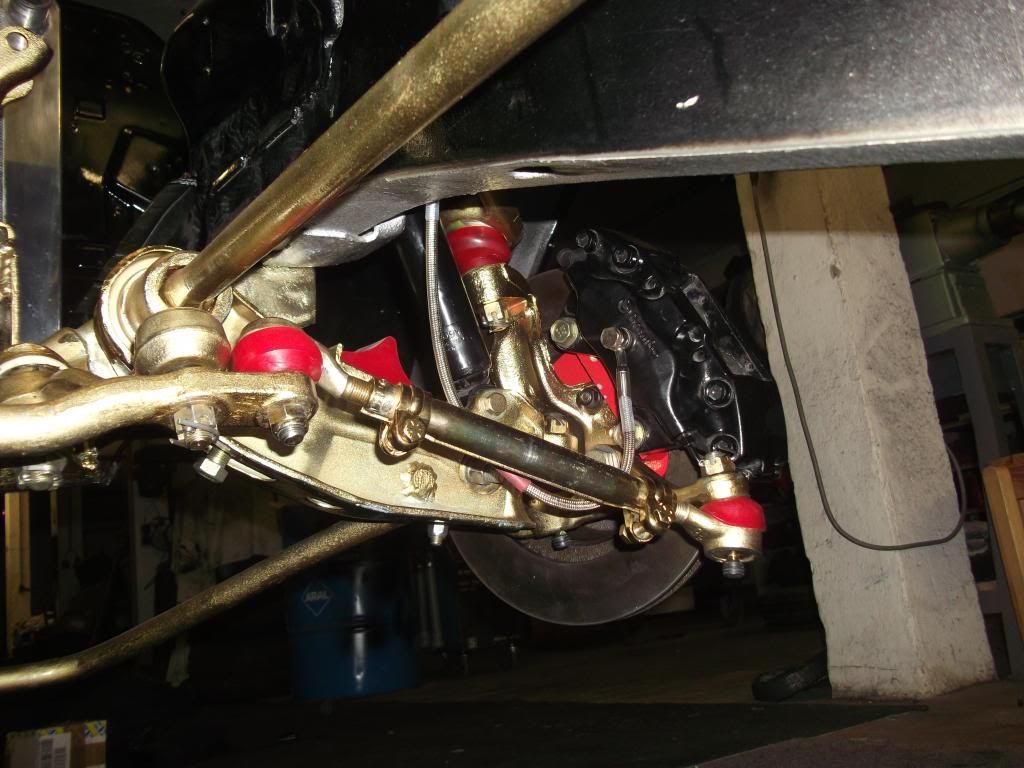
Brakes
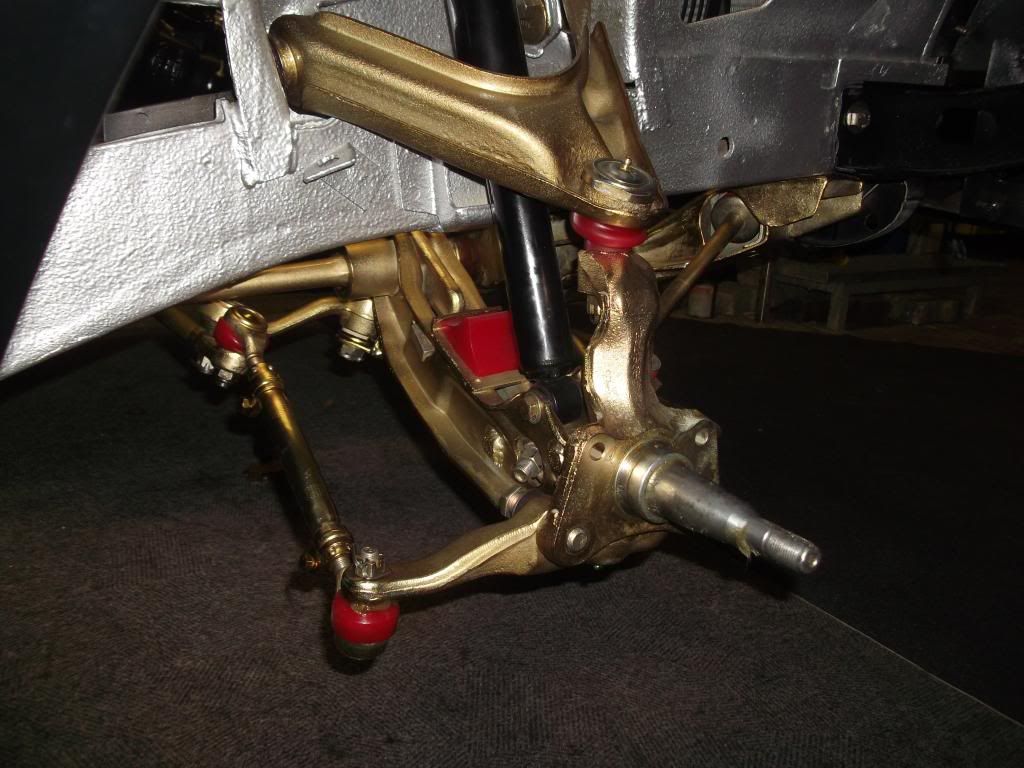
Front installed dodge viper caliper. The kit uses a spacer plate (red) to fit viper calipers. Also there are pad shim plates to bring the pad futher in. (gold with holes in )
Q. The spindel nut (wheel bearing) I take it i just nipp it up as its a cone roller bearing ???
<a href="http://beta.photobucket.com/" target="_blank"><img src="http://i73.photobucket.com/albums/i205/ ... e001-2.jpg" border="0" alt="Photobucket"></a>
<a href="http://beta.photobucket.com/" target="_blank"><img src="http://i73.photobucket.com/albums/i205/ ... e006-1.jpg" border="0" alt="Photobucket"></a>
<a href="http://beta.photobucket.com/" target="_blank"><img src="http://i73.photobucket.com/albums/i205/ ... ure008.jpg" border="0" alt="Photobucket"></a>
<a href="http://beta.photobucket.com/" target="_blank"><img src="http://i73.photobucket.com/albums/i205/ ... ure012.jpg" border="0" alt="Photobucket"></a>
<a href="http://beta.photobucket.com/" target="_blank"><img src="http://i73.photobucket.com/albums/i205/ ... e016-1.jpg" border="0" alt="Photobucket"></a>
<a href="http://beta.photobucket.com/" target="_blank"><img src="http://i73.photobucket.com/albums/i205/ ... ure019.jpg" border="0" alt="Photobucket"></a>
The honing plate is a metal plate that simulates the head being bolted on.
As you tighten the head down the cylinder walls desort and changes shape.
So its important to use this. Learn somthing new every day
<a href="http://beta.photobucket.com/" target="_blank"><img src="http://i73.photobucket.com/albums/i205/ ... kplate.jpg" border="0" alt="Photobucket"></a>
So
Brakes
Front installed dodge viper caliper. The kit uses a spacer plate (red) to fit viper calipers. Also there are pad shim plates to bring the pad futher in. (gold with holes in )
Q. The spindel nut (wheel bearing) I take it i just nipp it up as its a cone roller bearing ???
<a href="http://beta.photobucket.com/" target="_blank"><img src="http://i73.photobucket.com/albums/i205/ ... e001-2.jpg" border="0" alt="Photobucket"></a>
<a href="http://beta.photobucket.com/" target="_blank"><img src="http://i73.photobucket.com/albums/i205/ ... e006-1.jpg" border="0" alt="Photobucket"></a>
<a href="http://beta.photobucket.com/" target="_blank"><img src="http://i73.photobucket.com/albums/i205/ ... ure008.jpg" border="0" alt="Photobucket"></a>
<a href="http://beta.photobucket.com/" target="_blank"><img src="http://i73.photobucket.com/albums/i205/ ... ure012.jpg" border="0" alt="Photobucket"></a>
<a href="http://beta.photobucket.com/" target="_blank"><img src="http://i73.photobucket.com/albums/i205/ ... e016-1.jpg" border="0" alt="Photobucket"></a>
<a href="http://beta.photobucket.com/" target="_blank"><img src="http://i73.photobucket.com/albums/i205/ ... ure019.jpg" border="0" alt="Photobucket"></a>

-
autofetish
- Posts: 5599
- Joined: Sat May 21, 11 6:43 am
Dave wrote:And where is your workshop manual young man?autofetish wrote: Q. The spindel nut (wheel bearing) I take it i just nipp it up as its a cone roller bearing ???
The instructions below should read "90-in/lbs and then back off one slot".
Thanks dave a massive help as always.
Pete hope i did you proud nice kit thanks
-
autofetish
- Posts: 5599
- Joined: Sat May 21, 11 6:43 am
74challenger318 wrote: 2k clear will lift if not done with a etch
correct again it lifted
striped off all the clear paint and rubbed with wd40 will leave it like this now.
<a href="http://beta.photobucket.com/" target="_blank"><img src="http://i73.photobucket.com/albums/i205/ ... e040-1.jpg" border="0" alt="Photobucket"></a>
<a href="http://beta.photobucket.com/" target="_blank"><img src="http://i73.photobucket.com/albums/i205/ ... e042-1.jpg" border="0" alt="Photobucket"></a>
-
autofetish
- Posts: 5599
- Joined: Sat May 21, 11 6:43 am
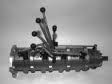
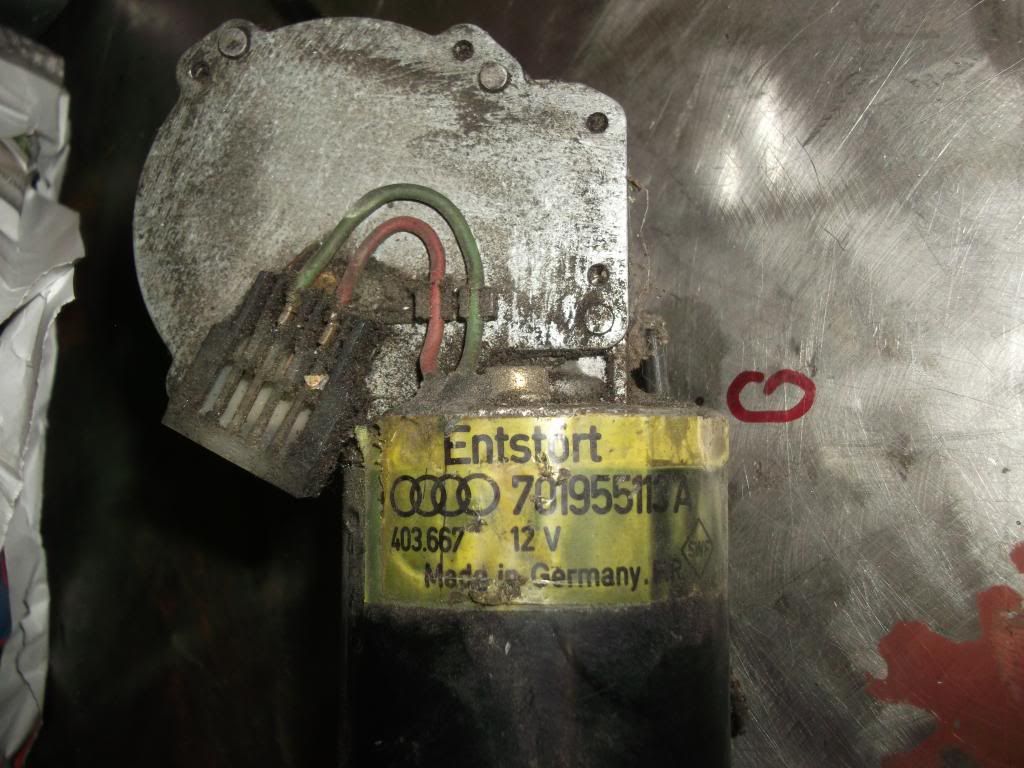
After spending too much time on the orginal wiper motor i gave up. The inner winding are fa bucked .
So i spend even more time running around scrap yards with a battery checking the speed of motors trying to find a modem wiper motor that will
Fit,geared correct,park alone, not to fast and not to slow.
Well i have it.
Might save some of you alot of $$ and time.
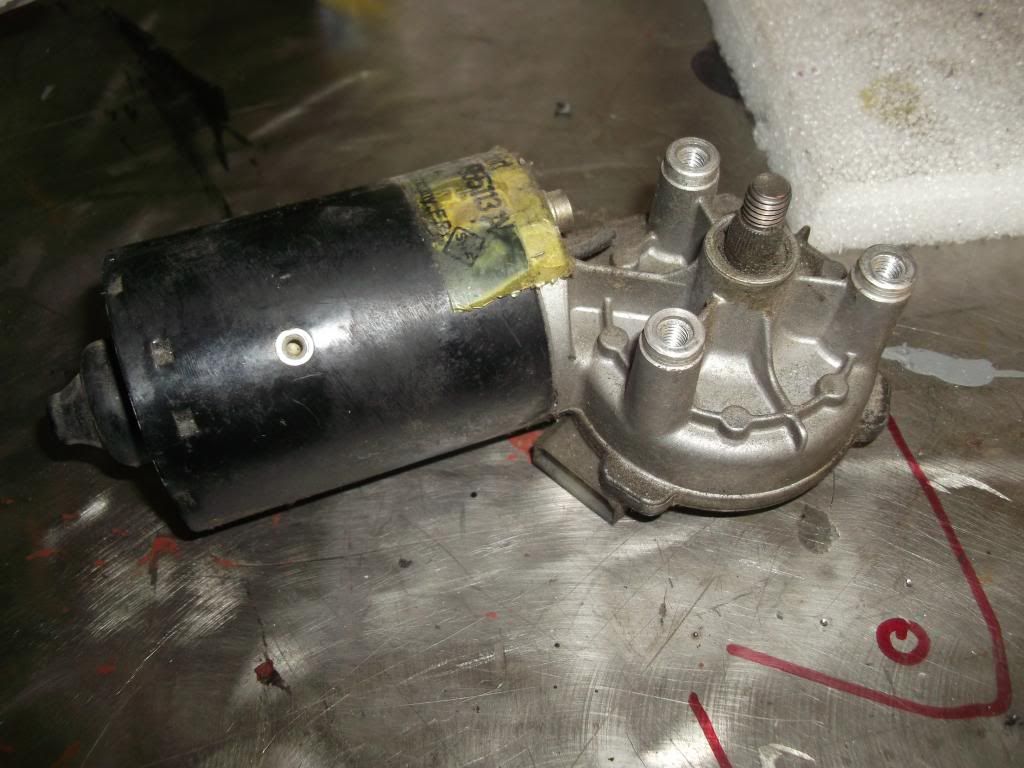
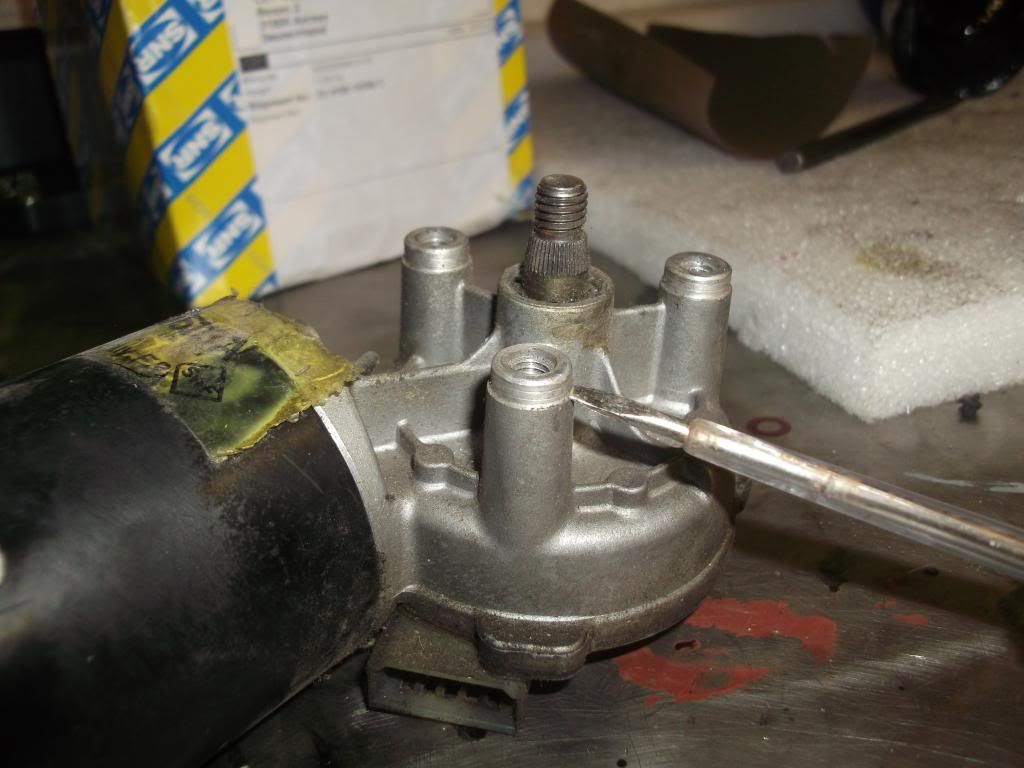
VW T4 Transporter front wiper motor 7 quid off ebay
Also used on some vw golfs im told
<a href="http://beta.photobucket.com/" target="_blank"><img src="http://i73.photobucket.com/albums/i205/ ... ure021.jpg" border="0" alt="Photobucket"></a>
<a href="http://beta.photobucket.com/" target="_blank"><img src="http://i73.photobucket.com/albums/i205/ ... e022-1.jpg" border="0" alt="Photobucket"></a>
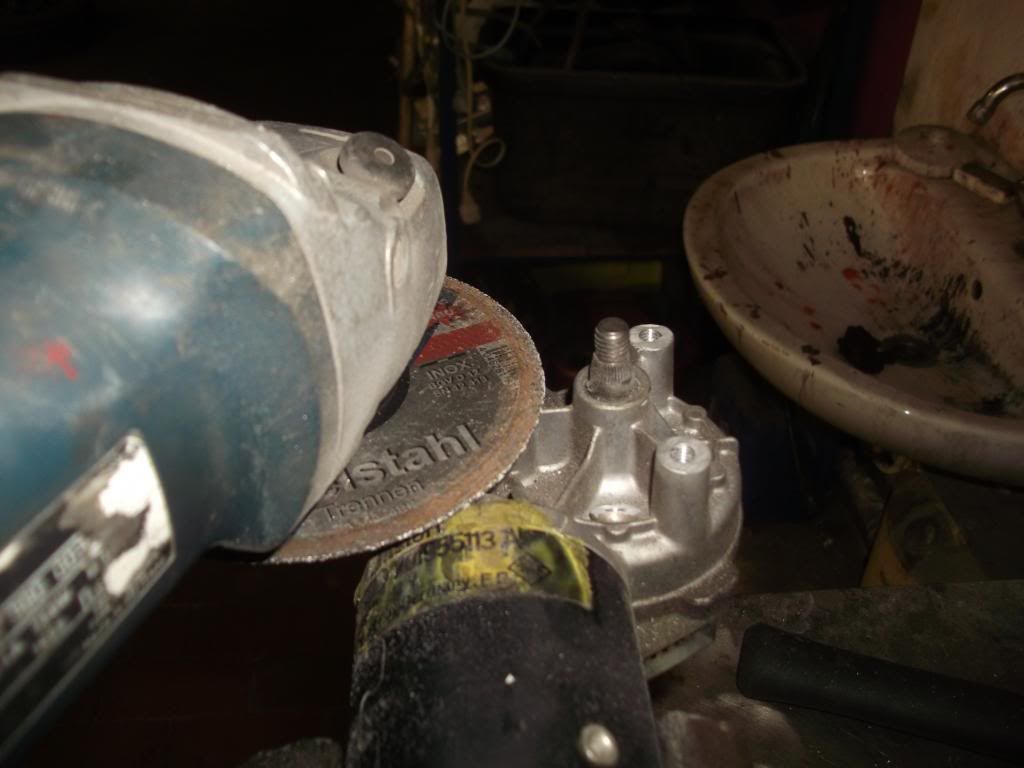
First step is to cut down the tread holes to the pre mark postion
<a href="http://beta.photobucket.com/" target="_blank"><img src="http://i73.photobucket.com/albums/i205/ ... ure024.jpg" border="0" alt="Photobucket"></a>
No fancy tools here
<a href="http://beta.photobucket.com/" target="_blank"><img src="http://i73.photobucket.com/albums/i205/ ... e025-2.jpg" border="0" alt="Photobucket"></a>
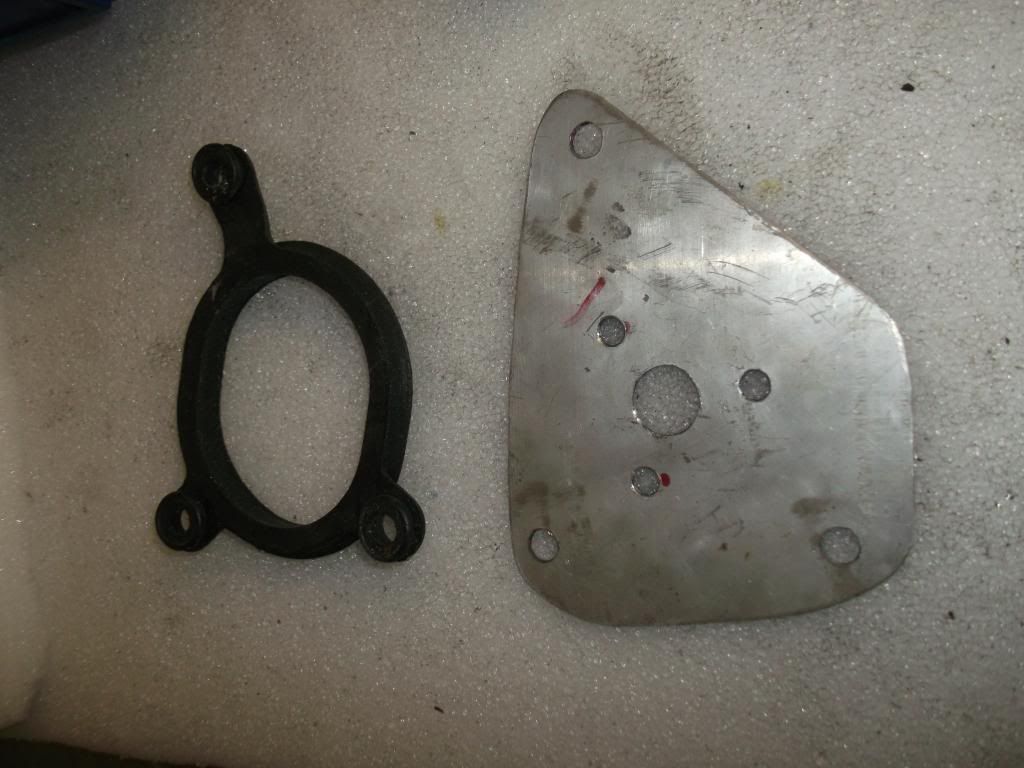
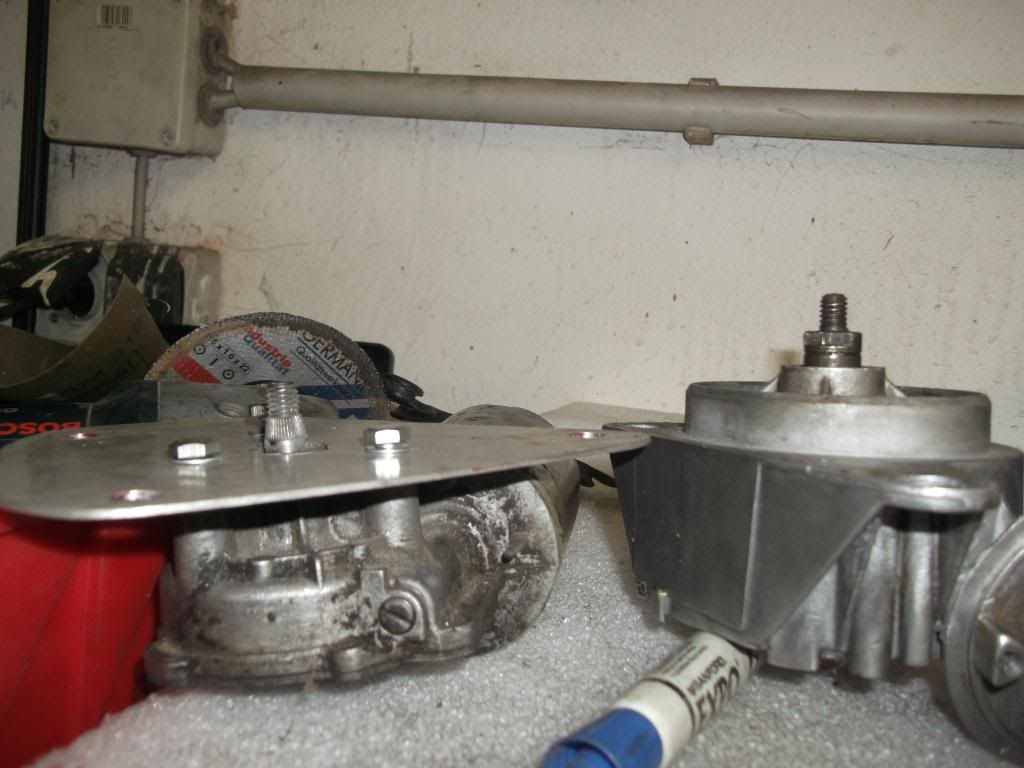
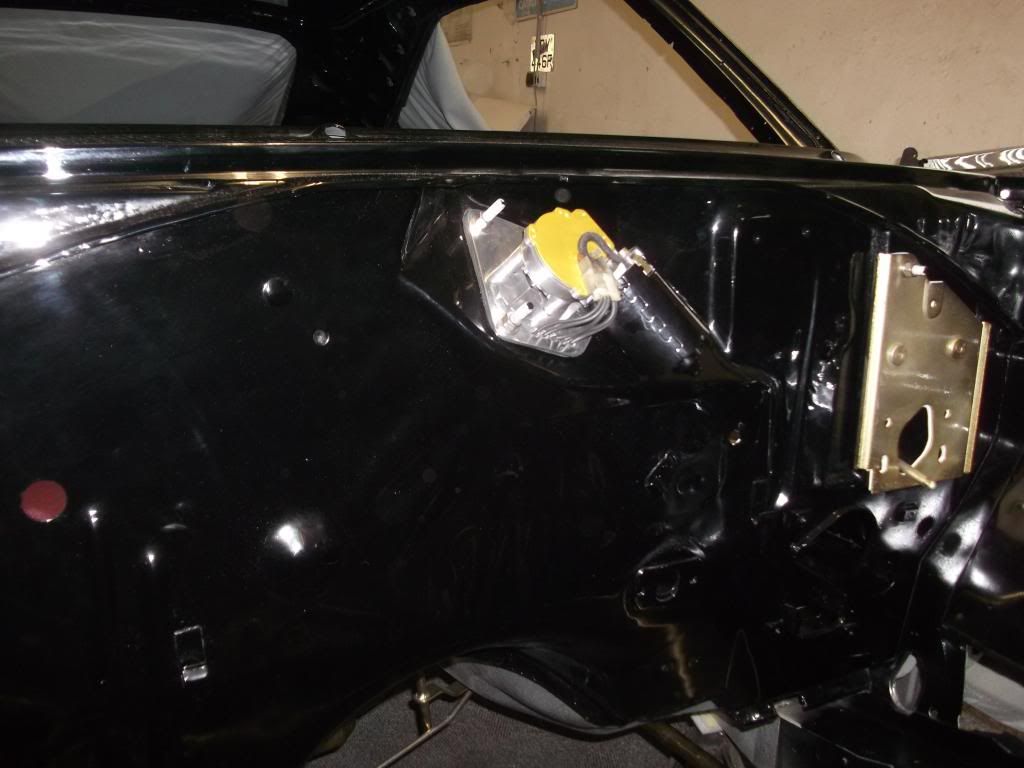
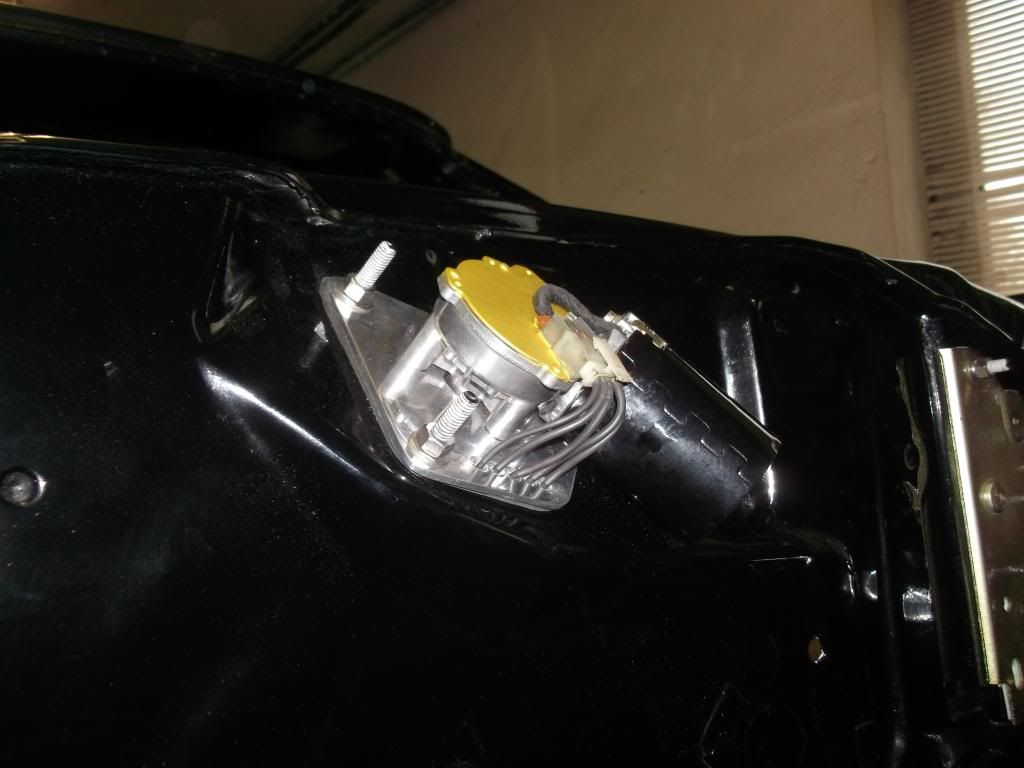
Next make a plate that will fit the car studs (use gasket for template) and the new motor studs.
<a href="http://beta.photobucket.com/" target="_blank"><img src="http://i73.photobucket.com/albums/i205/ ... e026-1.jpg" border="0" alt="Photobucket"></a>
<a href="http://beta.photobucket.com/" target="_blank"><img src="http://i73.photobucket.com/albums/i205/ ... ure027.jpg" border="0" alt="Photobucket"></a>
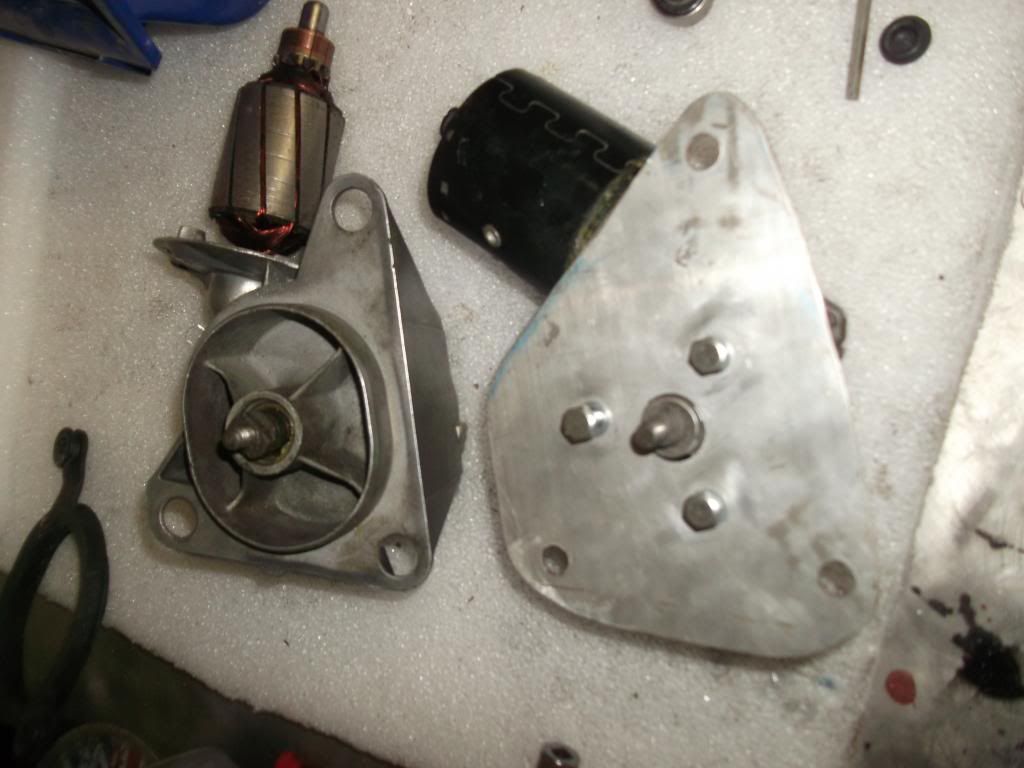
The nice thing about the vw motor is it has splines on the shalft so you can fit the arm at any postion. So when you make the plate dont worry about motor location just get it in the middle
<a href="http://beta.photobucket.com/" target="_blank"><img src="http://i73.photobucket.com/albums/i205/ ... e031-2.jpg" border="0" alt="Photobucket"></a>
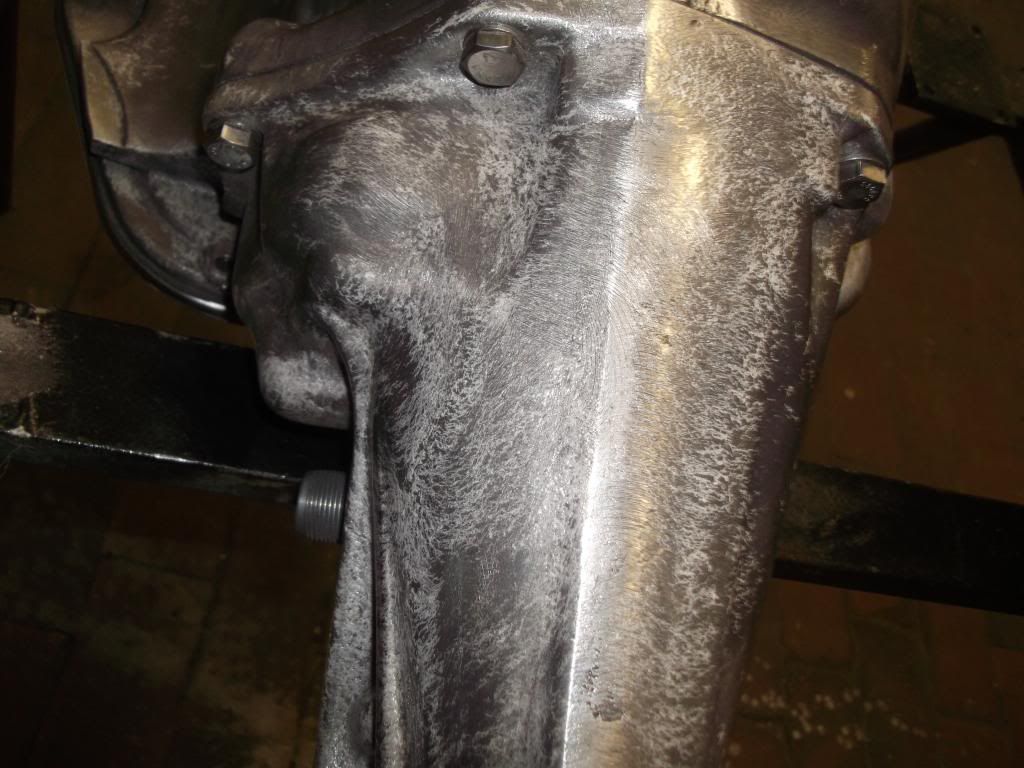
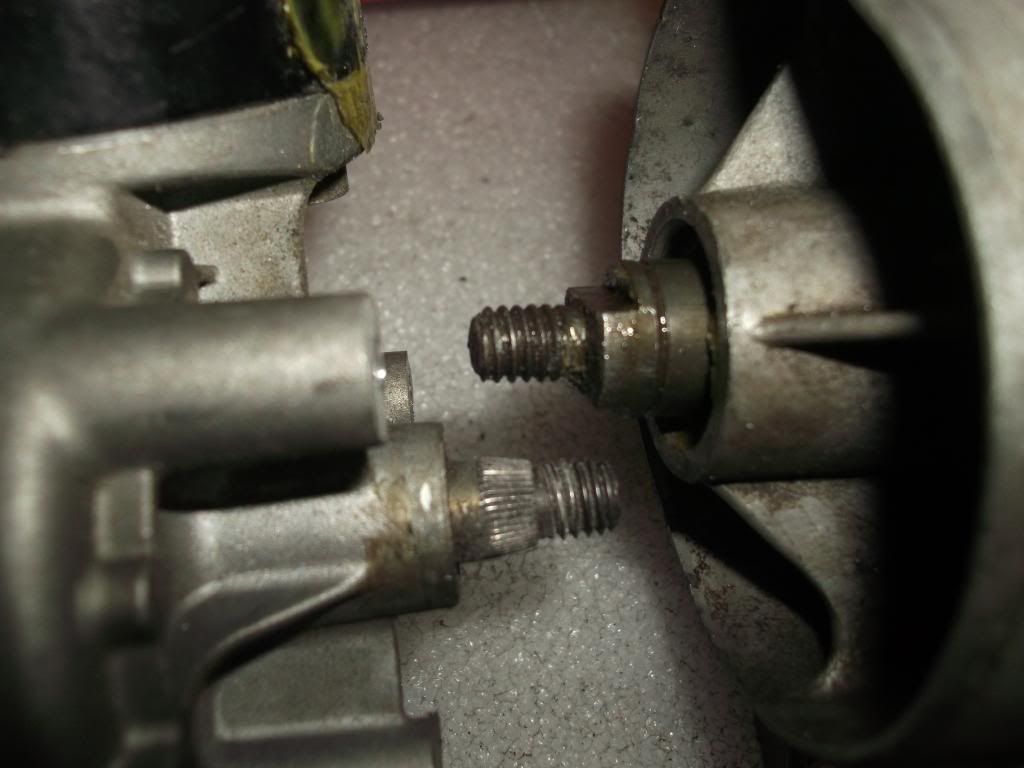
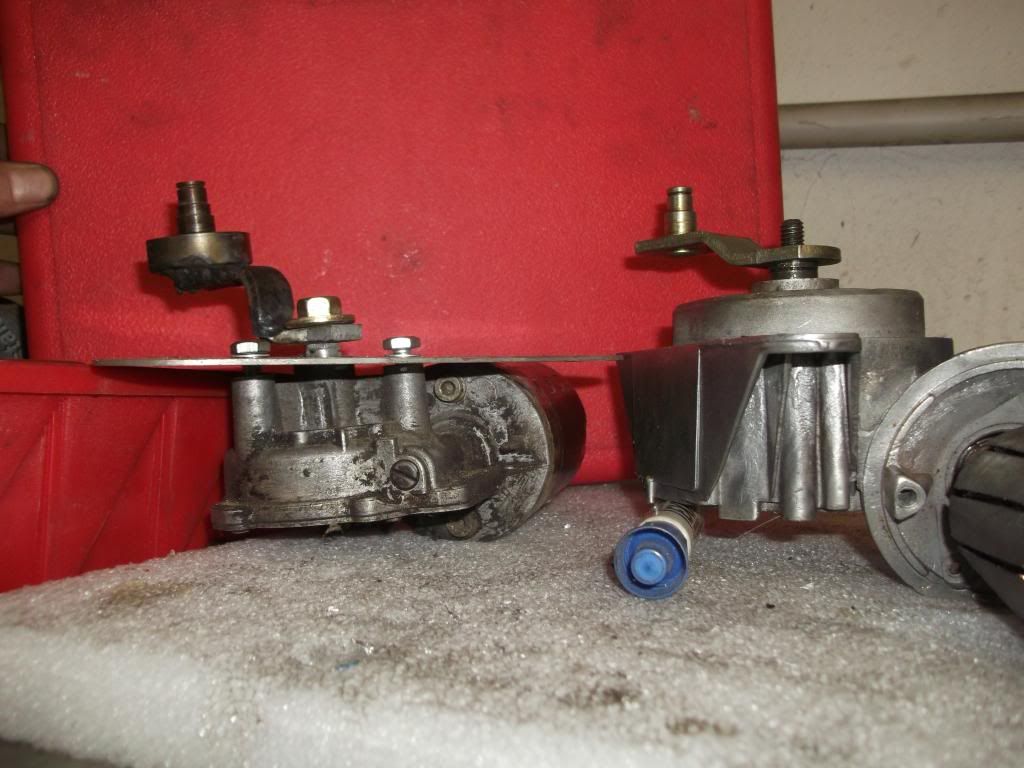
The next problem is the axle on the orginal motor sticks out more that the vw one does.
<a href="http://beta.photobucket.com/" target="_blank"><img src="http://i73.photobucket.com/albums/i205/ ... ure028.jpg" border="0" alt="Photobucket"></a>
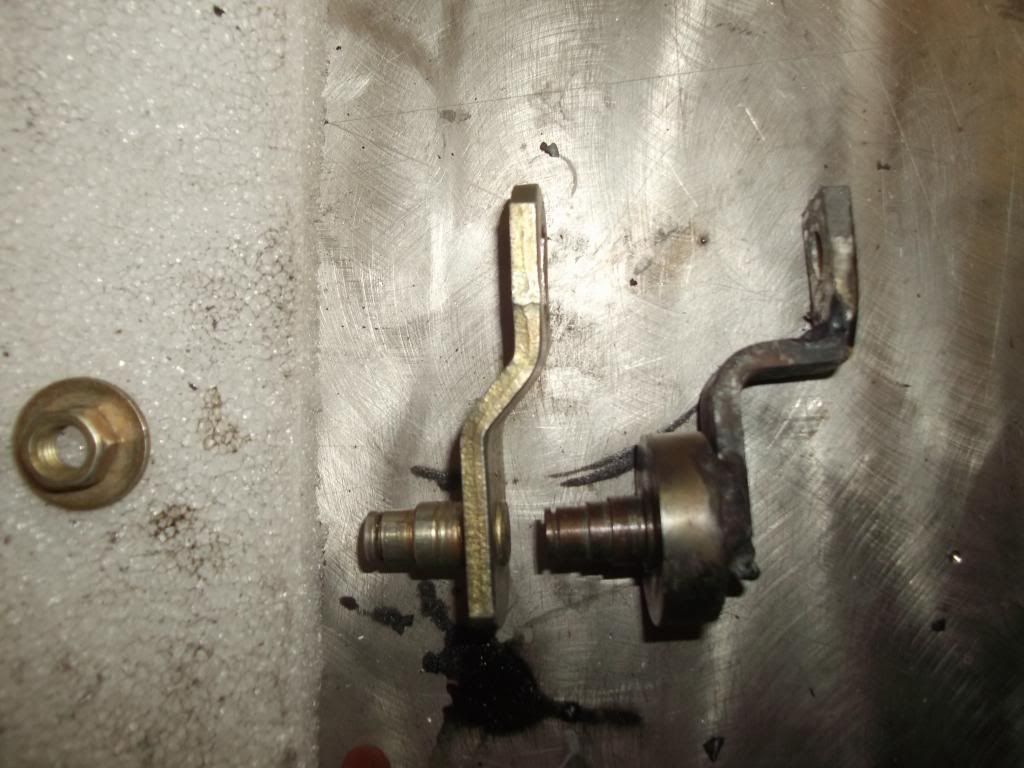
To make this arm you could so easyly just cut the old one and weld a bit of metal so it sticks out more. i did want to cut up my orginal one as was in test stage so i made one badly.
<a href="http://beta.photobucket.com/" target="_blank"><img src="http://i73.photobucket.com/albums/i205/ ... e030-2.jpg" border="0" alt="Photobucket"></a>
<a href="http://beta.photobucket.com/" target="_blank"><img src="http://i73.photobucket.com/albums/i205/ ... e029-1.jpg" border="0" alt="Photobucket"></a>
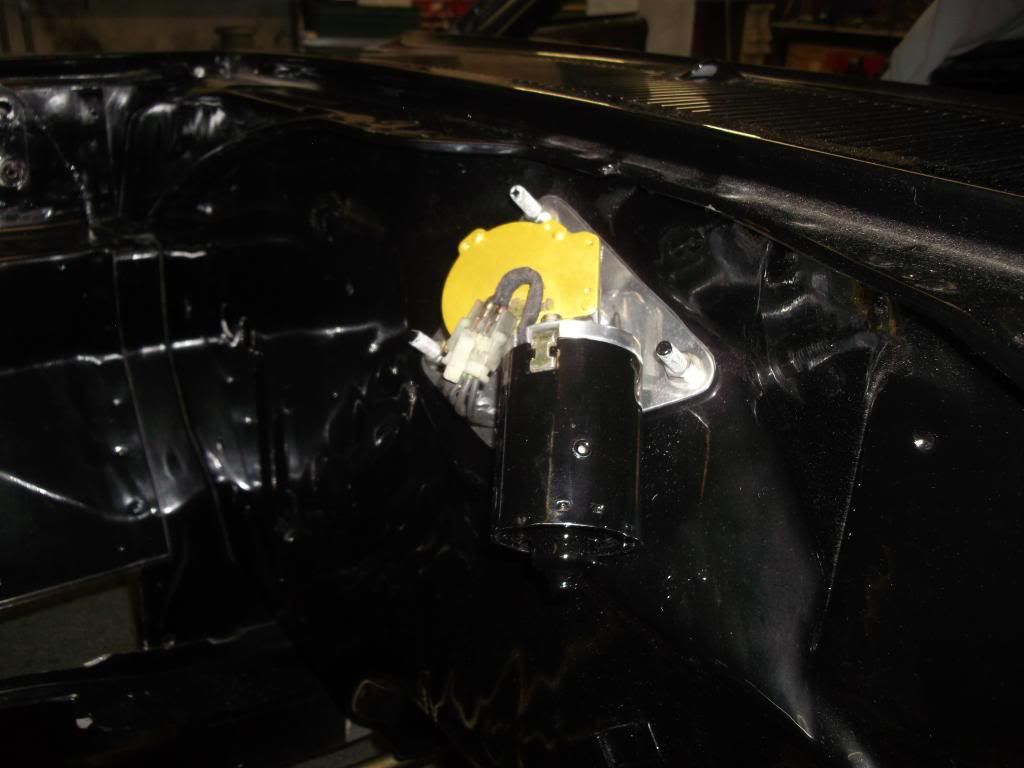
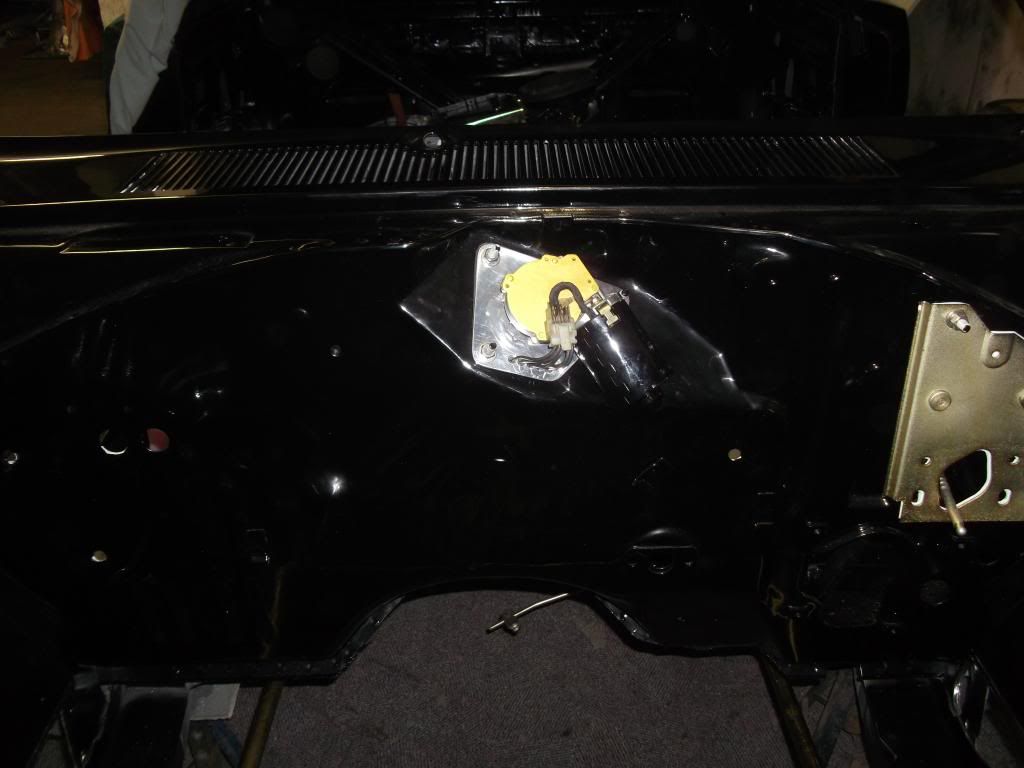
You should now have a modem motor that turns at simular speed in the same place as the old you can now just clip on the orginal wiper mech and fanny is your ant.
Below is a cable wiring diagram the front motor is the one on the left.
http://www.t4-wiki.de/wiki/images/Elekt ... d_1999.jpg
can some cleaver person attache that incase link dont work in future
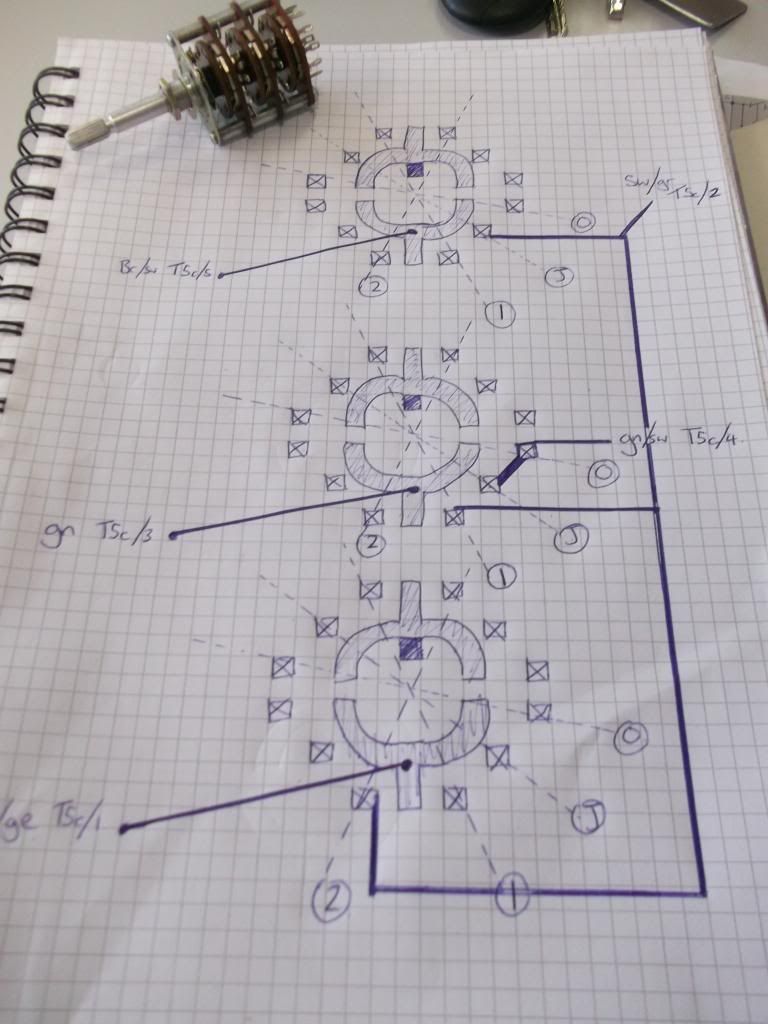
For a 2 speed slow and fast really easy.
If you want ajustable inter and water wash 3 wipe then you gona have fun.
Im now building a switch to use in J 0 T 1 2 3
<a href="http://beta.photobucket.com/" target="_blank"><img src="http://i73.photobucket.com/albums/i205/ ... e044-1.jpg" border="0" alt="Photobucket"></a>
Cleaned up on car
<a href="http://beta.photobucket.com/" target="_blank"><img src="http://i73.photobucket.com/albums/i205/ ... e035-2.jpg" border="0" alt="Photobucket"></a>
<a href="http://beta.photobucket.com/" target="_blank"><img src="http://i73.photobucket.com/albums/i205/ ... e032-2.jpg" border="0" alt="Photobucket"></a>
<a href="http://beta.photobucket.com/" target="_blank"><img src="http://i73.photobucket.com/albums/i205/ ... e038-1.jpg" border="0" alt="Photobucket"></a>
<a href="http://beta.photobucket.com/" target="_blank"><img src="http://i73.photobucket.com/albums/i205/ ... e037-1.jpg" border="0" alt="Photobucket"></a>
So i spend even more time running around scrap yards with a battery checking the speed of motors trying to find a modem wiper motor that will
Fit,geared correct,park alone, not to fast and not to slow.
Well i have it.
Might save some of you alot of $$ and time.
VW T4 Transporter front wiper motor 7 quid off ebay
Also used on some vw golfs im told
<a href="http://beta.photobucket.com/" target="_blank"><img src="http://i73.photobucket.com/albums/i205/ ... ure021.jpg" border="0" alt="Photobucket"></a>
<a href="http://beta.photobucket.com/" target="_blank"><img src="http://i73.photobucket.com/albums/i205/ ... e022-1.jpg" border="0" alt="Photobucket"></a>
First step is to cut down the tread holes to the pre mark postion
<a href="http://beta.photobucket.com/" target="_blank"><img src="http://i73.photobucket.com/albums/i205/ ... ure024.jpg" border="0" alt="Photobucket"></a>
No fancy tools here
<a href="http://beta.photobucket.com/" target="_blank"><img src="http://i73.photobucket.com/albums/i205/ ... e025-2.jpg" border="0" alt="Photobucket"></a>
Next make a plate that will fit the car studs (use gasket for template) and the new motor studs.
<a href="http://beta.photobucket.com/" target="_blank"><img src="http://i73.photobucket.com/albums/i205/ ... e026-1.jpg" border="0" alt="Photobucket"></a>
<a href="http://beta.photobucket.com/" target="_blank"><img src="http://i73.photobucket.com/albums/i205/ ... ure027.jpg" border="0" alt="Photobucket"></a>
The nice thing about the vw motor is it has splines on the shalft so you can fit the arm at any postion. So when you make the plate dont worry about motor location just get it in the middle
<a href="http://beta.photobucket.com/" target="_blank"><img src="http://i73.photobucket.com/albums/i205/ ... e031-2.jpg" border="0" alt="Photobucket"></a>
The next problem is the axle on the orginal motor sticks out more that the vw one does.
<a href="http://beta.photobucket.com/" target="_blank"><img src="http://i73.photobucket.com/albums/i205/ ... ure028.jpg" border="0" alt="Photobucket"></a>
To make this arm you could so easyly just cut the old one and weld a bit of metal so it sticks out more. i did want to cut up my orginal one as was in test stage so i made one badly.
<a href="http://beta.photobucket.com/" target="_blank"><img src="http://i73.photobucket.com/albums/i205/ ... e030-2.jpg" border="0" alt="Photobucket"></a>
<a href="http://beta.photobucket.com/" target="_blank"><img src="http://i73.photobucket.com/albums/i205/ ... e029-1.jpg" border="0" alt="Photobucket"></a>
You should now have a modem motor that turns at simular speed in the same place as the old you can now just clip on the orginal wiper mech and fanny is your ant.
Below is a cable wiring diagram the front motor is the one on the left.
http://www.t4-wiki.de/wiki/images/Elekt ... d_1999.jpg
can some cleaver person attache that incase link dont work in future
For a 2 speed slow and fast really easy.
If you want ajustable inter and water wash 3 wipe then you gona have fun.
Im now building a switch to use in J 0 T 1 2 3
<a href="http://beta.photobucket.com/" target="_blank"><img src="http://i73.photobucket.com/albums/i205/ ... e044-1.jpg" border="0" alt="Photobucket"></a>
Cleaned up on car
<a href="http://beta.photobucket.com/" target="_blank"><img src="http://i73.photobucket.com/albums/i205/ ... e035-2.jpg" border="0" alt="Photobucket"></a>
<a href="http://beta.photobucket.com/" target="_blank"><img src="http://i73.photobucket.com/albums/i205/ ... e032-2.jpg" border="0" alt="Photobucket"></a>
<a href="http://beta.photobucket.com/" target="_blank"><img src="http://i73.photobucket.com/albums/i205/ ... e038-1.jpg" border="0" alt="Photobucket"></a>
<a href="http://beta.photobucket.com/" target="_blank"><img src="http://i73.photobucket.com/albums/i205/ ... e037-1.jpg" border="0" alt="Photobucket"></a>
Last edited by autofetish on Tue Nov 13, 12 4:01 pm, edited 1 time in total.
-
autofetish
- Posts: 5599
- Joined: Sat May 21, 11 6:43 am

-
Cannonball

- Posts: 17242
- Joined: Sun Apr 18, 04 11:26 pm
- Location: crewe, cheshire
- Contact:
nice one wil only bit that could be better and maybe it can not be done because of stud locations the mtr would look better running level with the upper rail on the bulk head,
jee up you have virtually built a car and using viper brakes while Allkiller is slashing us about them, ha ha,


jee up you have virtually built a car and using viper brakes while Allkiller is slashing us about them, ha ha,
www.dwatts80.fsnet.co.uk
WATTS RACING TRANSMISSIONS, CLOBBER THE COMPETITION ITS CLOBBERIN TIME
OFTEN OUTNUMBERED NEVER OUTGUNNED,
HEY WHATS THE TOP END ON THAT SUPERSPORTS. UNLIMITED,
I HAVE A NVQW
LIFE GOES PRETTY FAST, IF YOU DONT LOOK ROUND A WHILE YOU MAY JUST MISS IT,
THE PASS IS THE JUICE,
LOVED BY FEW,
HATED BY MANY
RESPECTED BY ALL

I used a Mk2 Astra wiper motor on the Dart. I made a bracket and flipped it so it was hidden inside the car. Took a bit of working out but it worked perfectly. Gained intermittent wipe which would have been useful had I ever driven it in the wet
Don't have a picture of the motor installation, but you can see where it isn't anymore...
Don't have a picture of the motor installation, but you can see where it isn't anymore...
- Attachments
-
- P1010014_8.JPG (122.79 KiB) Viewed 1047 times