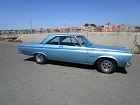
db's 66 Belvedere ***FOR SALE***
Moderator: Moderators
Luckily i did start from scratch with my rear end so i know that's all bang-on.
I'm just going to stick with the single tube rack mount for now as i need to get MOT'd and registered asap.
I'll pull it back 3" as in plan C and correct the height to line it up with at least one of the A-arms
Once it's registered i'll tear it all down and start the front end from scratch aswell.
I'm just going to stick with the single tube rack mount for now as i need to get MOT'd and registered asap.
I'll pull it back 3" as in plan C and correct the height to line it up with at least one of the A-arms
Once it's registered i'll tear it all down and start the front end from scratch aswell.
No-one will believe you...
-
autofetish
- Posts: 5599
- Joined: Sat May 21, 11 6:43 am
latil wrote:I have one of those tube benders,not good on thin wall stuff,not bad on 2mm upwards. I find it tends to flatten the tube mid bend and tube goes egg shaped.
I also have this and if you fill the tube with casting sand packed tight and then weld the ends up they do come out better. (lot of work) I also try ed heating with oxy till it was red hot and didn't really help.
-
latil
- Posts: 12076
- Joined: Tue Feb 01, 05 10:37 pm
- Location: Steve Pearson MMA/014. East Grinstead and Carmarthen.
Not really practical on pipe this size is to fill with molten lead,do the bending and then melt it out. A method that I've used on small bore model steam engine pipes.
1965 Belvedere 2 426 Wedge.
Climate change,global warming,the biggest tax raising scam ever devised by man for mankind.
Motivating Our People,Accelerating Rapidly.
Climate change,global warming,the biggest tax raising scam ever devised by man for mankind.
Motivating Our People,Accelerating Rapidly.
-
autofetish
- Posts: 5599
- Joined: Sat May 21, 11 6:43 am
I finally have the rack in the right place and tack-welded in 
It took most of yesterday to get it lined up and all that did was prove how badly the A-arm mounts were out of line
I got the rack millimetre-perfect level and centred in all planes, only to find one wheel kicked out at the back. This could only be due the bottom A-arms being unequal.
Luckily they're adjustable on the rod-ends so i managed to get the wheels symmetrical without any more cutting & welding. Obviously once i've got registering sorted it'll still all have to come off but it's good enough for now
- Attachments
-
- Rack in place, ready to weld 02.jpg (243.91 KiB) Viewed 1016 times
-
- Rack in place, ready to weld 01.jpg (178.52 KiB) Viewed 1016 times
No-one will believe you...
I've had a poly steering column bush made so that's sorted now 
I need to shorten the steering shaft now as i've moved the rack back, only i'm a bit concerned about the way the uj attaches to the shaft- it just slips on and is drilled for a little nut & bolt. Doesn't seem very secure to me?
The lower uj mounts on splines onto the rack, so much better.
I need to shorten the steering shaft now as i've moved the rack back, only i'm a bit concerned about the way the uj attaches to the shaft- it just slips on and is drilled for a little nut & bolt. Doesn't seem very secure to me?
The lower uj mounts on splines onto the rack, so much better.
- Attachments
-
- 01 Steering column- Poly lower bush.jpg (127.56 KiB) Viewed 976 times
No-one will believe you...
Brakes pretty much sorted now with Daisy's assistance
I've made all the brackets & run the cable, we plumbed in the copper lines and mounted everything. Just waiting on a couple of adaptors to connect up the Linelok and i can bung in the fluid.
Only concern is i didn't allow for the Z-bar, may have to re-route a bit when i try to fit.
I've 'adjusted' the Parking brake release handle to clear the cage.
I had to drill the cage outrigger to route the cable.
- Attachments
-
- 04 Parking brake- front cable chassis route.jpg (174.36 KiB) Viewed 964 times
-
- 03 Parking brake- mech.jpg (81.08 KiB) Viewed 964 times
-
- 02 Brakes- Daisy flaring pipes.jpg (157.97 KiB) Viewed 964 times
-
- 01 Brakes- engine bay.jpg (144.3 KiB) Viewed 964 times
No-one will believe you...
I made this guide for the turn in the Parking brake cable. It may need to be stronger but it's bolt-on so i can re-do if needed.
I've cunningly located the bias adjuster so the knob appears under the seat.
The rear cable inners were differnt lengths so i made this little spacer. They may equalise once it's all under tension. If so, i can simply take this out.
I've cunningly located the bias adjuster so the knob appears under the seat.
The rear cable inners were differnt lengths so i made this little spacer. They may equalise once it's all under tension. If so, i can simply take this out.
- Attachments
-
- 08 Parking brake- rear balance bar.jpg (86.79 KiB) Viewed 959 times
-
- 07 Brakes- Bias adjuster 02.jpg (119.89 KiB) Viewed 959 times
-
- 06 Brakes- Bais adjuster 01.jpg (104.57 KiB) Viewed 959 times
-
- 05 Parking brake- front cable guide.jpg (159.88 KiB) Viewed 959 times
No-one will believe you...
Time for a long overdue progress report...
After weeks of struggling with lack of time, money and enthusiasm i've got somewhere!
I have WORKING BRAKES!!! They need re-bleeding but there's pressure there and the linelok and parking brake work.
I re-routed the pipes below the m/cyl as i realised they'd be in the way of the clutch rod.
It has a face! I've put the brand new grille & headlamp surrounds on as well as the tail & reversing (soon to be rear indicator) lamps, just need orange bulbs
Tomorrow my mate Ritchie will have a pair of 7" halogen headlamps, a neat washer pump & bottle and a better upper steering shaft u.j.- a Vauxhall one which is the right shaft diameter but has a flat on one side- much safer than relying on a teeny nut n bolt!
I finally have a bellhousing on the way- Thanks Jon.
I've ordered all the hose and fittings i need to complete the fuel system.
I have a huge nitrous bottle on the way- ebay bargain! (I won't be plumbing the N2O in til after registration, etc)
Tamzin's brother plans to wire the whole car for me from scratch once the motor's in- what a star!
- Attachments
-
- Belve face on.jpg (153.24 KiB) Viewed 916 times
-
- Rerouted brake pipes.jpg (133.53 KiB) Viewed 916 times
No-one will believe you...
-
mopar_mark
- Posts: 6743
- Joined: Fri Jul 14, 06 8:01 pm
- Location: Windlesham, Surrey
Sorry, haven't seen your thread for a while.
Top work on the rest of the work, looks like your making good progress now
That bolt looks similar size to mine, assuming a good quality bolt, it will perform well in a shear application.db wrote: I'm a bit concerned about the way the uj attaches to the shaft- it just slips on and is drilled for a little nut & bolt. Doesn't seem very secure to me?
Top work on the rest of the work, looks like your making good progress now
"I spent a lot of money on booze, birds and fast cars. The rest I just squandered."